Too often the bedroom is neglected in favor of decorating public rooms. Here’s how we transformed an ordinary master bedroom into a luscious, crystalline sanctuary.
1.PICK A PALE PALETTE. You need not limit yourself to one hue to achieve a calm setting. Mix several quiet colors; their equal value enables you to blend patterns without overwhelming the room. Since the homeowner had just recovered her chair and ottoman in blush-colored ultrasuede, we developed a palette of blush and gray, adding ivory, silver and crystal elements. The geometric pattern of the gray area rug grounds the silver-toned furnishings and the palette is unified by the ivory floral linen of the draperies and pillows.
2. TEXTURAL VARIETY KEEPS A QUIET PALETTE FROM FIZZLING. The stunning Brazilian rock crystal chandelier and silver toned lamps add light and sparkle to counteract the dark wood ceiling. We topped the smooth cotton patterned sheeting with a furry throw. The four-poster bed has a painted “moonstone” finish and a rough linen upholstered headboard. Beaded pillows, smooth marble-topped side table, plants and flowers add more texture. The “BEFORE” shot below shows the how dark and shadowy the room used to be.
3. CREATE LITTLE ISLANDS. Supplement your bed with another soft spot, such as a chaise, chair and ottoman, or window seat. You can’t see the chair in the “BEFORE” photo because it’s in the opposite corner. We moved it to the window corner so it would be more inviting, and added a little table to hold a cup of coffee or glass of wine.
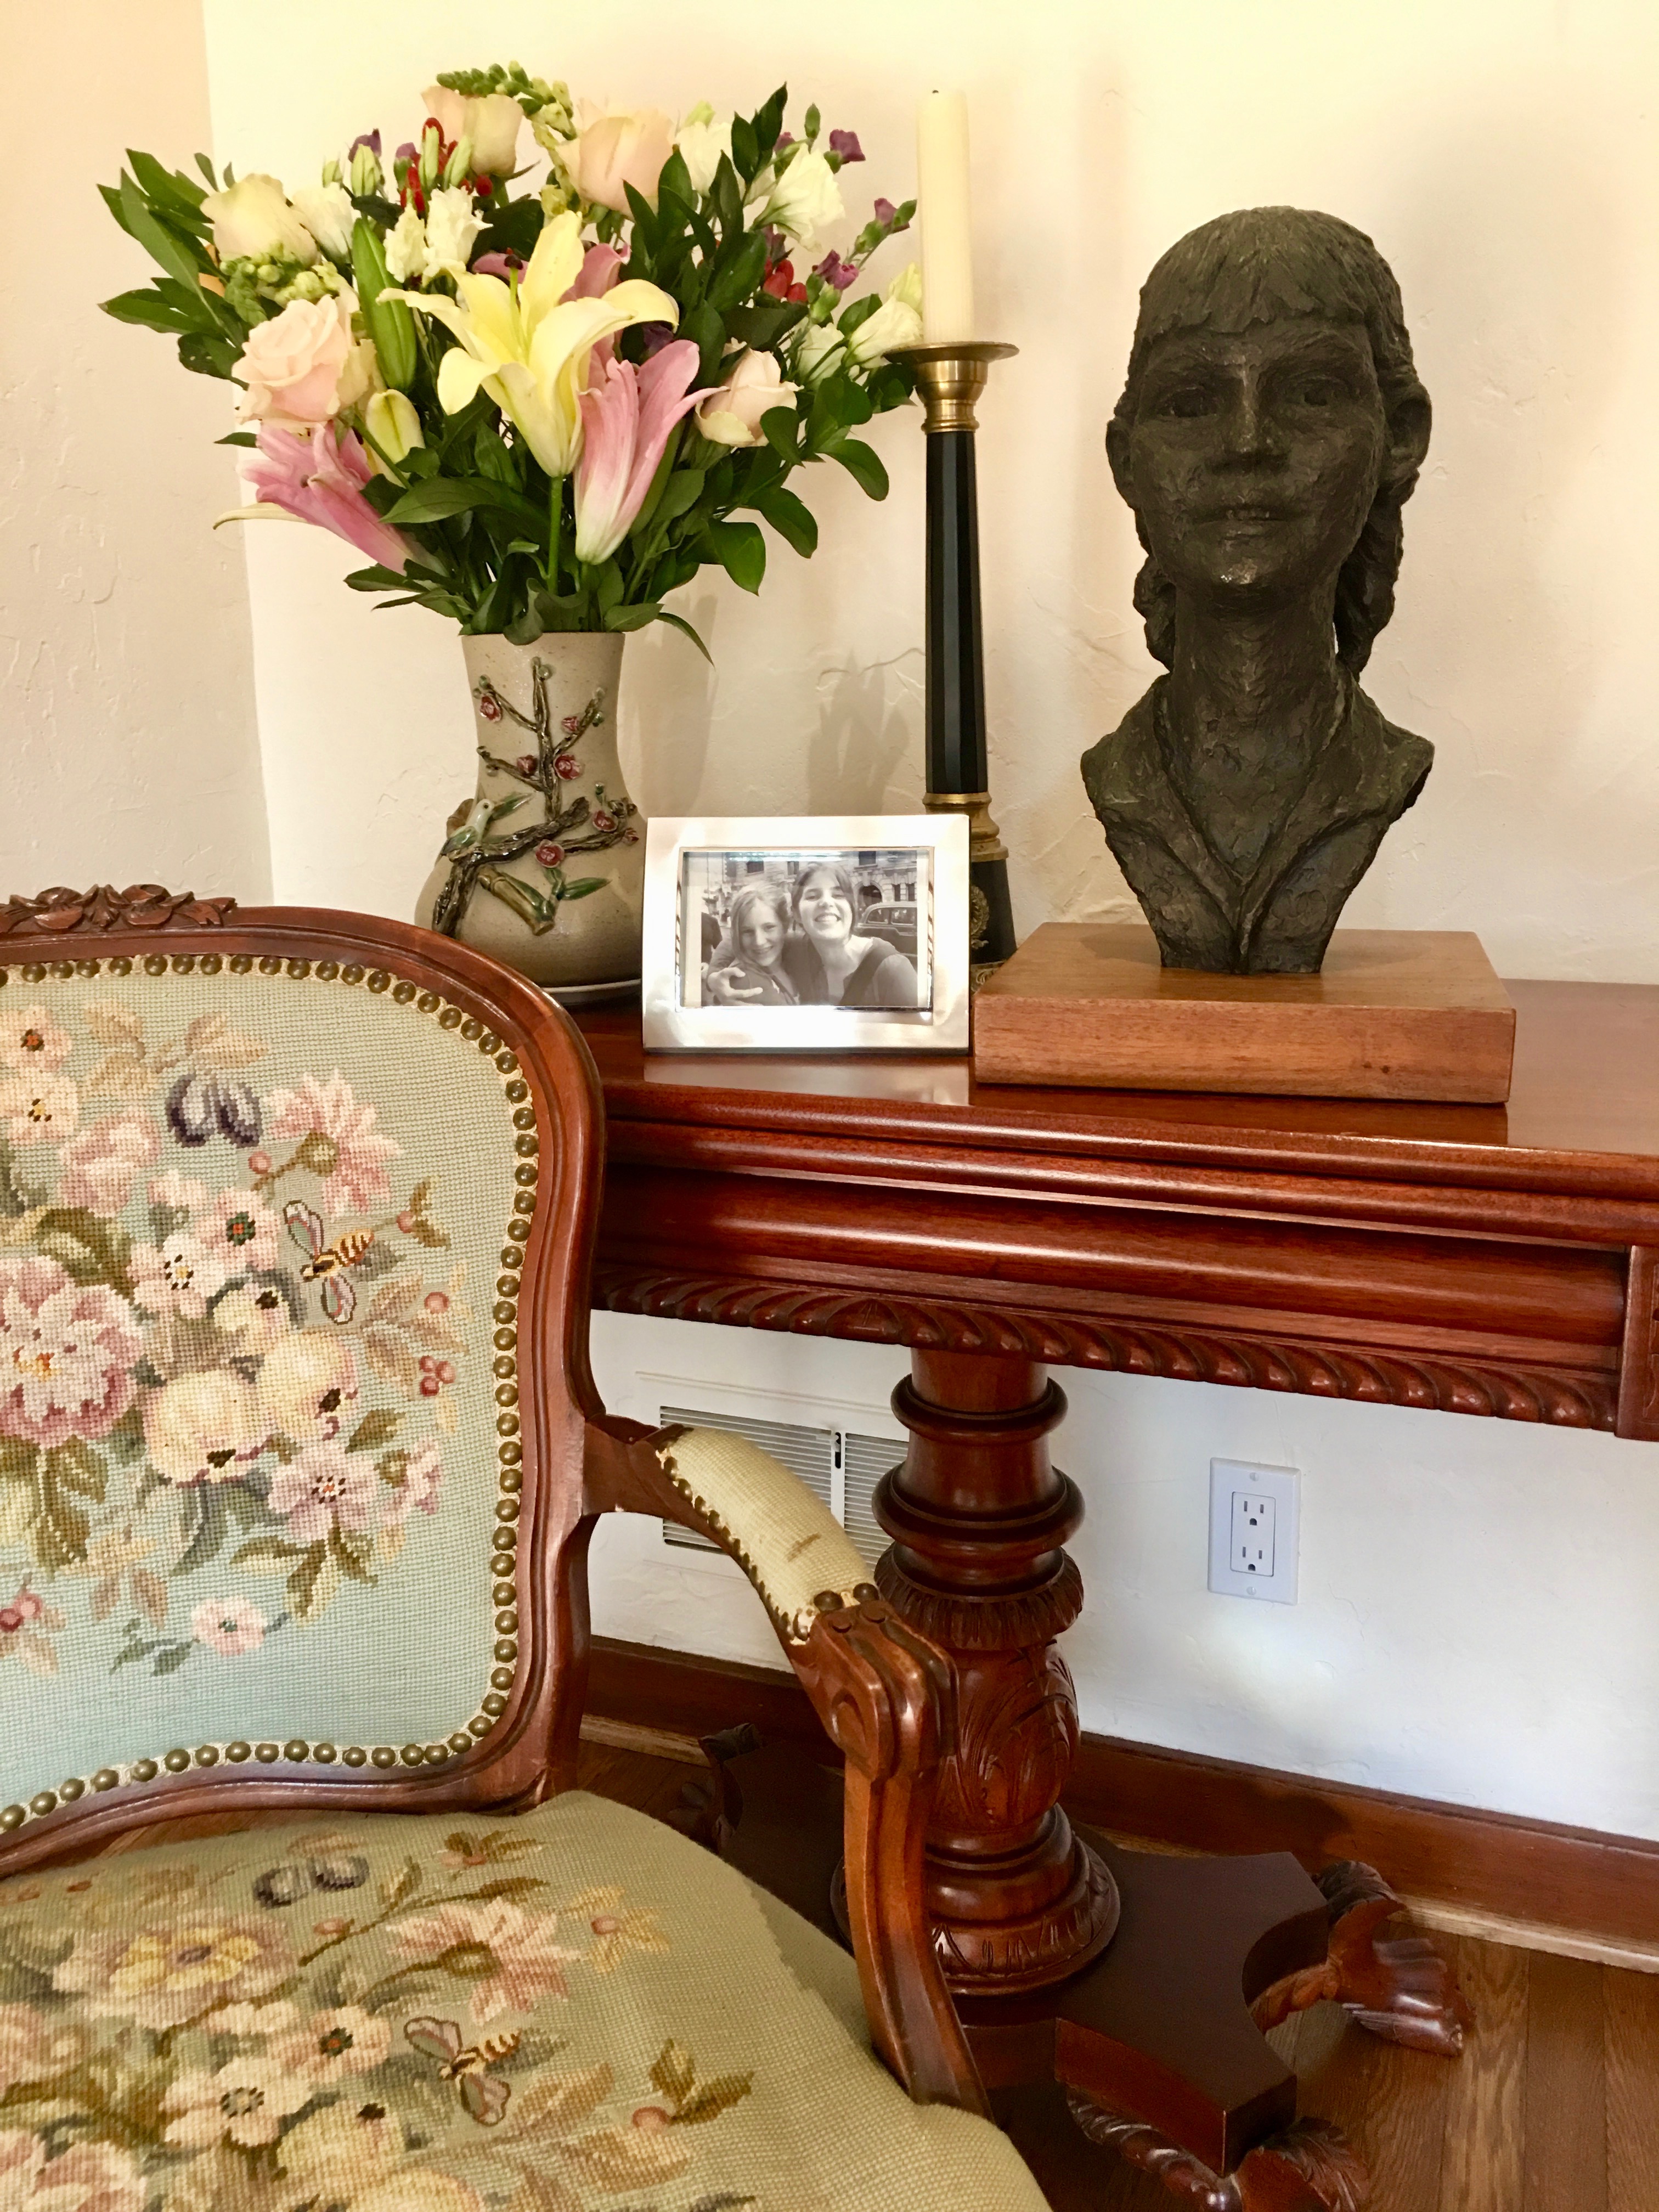
4. KEEP LOVED ONES CLOSE. Elements of your style–books, a woven throw, photographs, candles, flowers–will never look out of place in the room you call your own.
There’s more than one way to turn your bedroom into a soothing retreat. We hope that these ideas will help you to establish one of your own. If you need help, give Emery & Associates a call. We love helping people create the rooms of their dreams.
You can have great interiors with kids and pets if you take into consideration during your planning stages the special challenges posed by living with the little critters. Here are some of the ways I’ve discovered through my own experience and that of my clients.
For Colors, Think Medium Tones. Very dark and very light solid colors show a lot more dirt than medium tones. A couple with no children and no pets, who don’t serve a lot of red wine at parties, can get away with all white sofas. You can’t, unless it’s white leather, and then only if you have children and dogs past the teething stage (cats have been known to shred leather). Light colored flooring shows every footprint and Playdoh dropping, but hardwood flooring in a medium tone stain (not bleached, pickled or stained very dark) hardly shows any dirt and costs about the same as the highest quality inlaid vinyl. Medium-toned fabrics and carpeting show less lint and pet hair than very dark ones, so stay away from solid navy, forest green, burgundy, and black for broadloom carpeting or you will be vacuuming every day.
For Fabrics and Carpeting, Think Pattern. Patterned fabrics, especially random, all-over patterns, are my favorites for hiding slobber, stains and spills. Slipcovering your sofas and chairs in medium to dark background patterned fabrics is the most practical kind of seating to have—when the dirt finally does start to be apparent, you can remove the slipcovers and launder or dry clean them. Although the current generation of nylon broadloom carpeting resists stains so well that even pet accidents and muddy footprints can be cleaned up quickly and easily, my all-time favorite carpets for hiding the kind of hard wear kids and animals do to floors are Oriental rugs. Before you insist you can’t afford them, compare what you would spend for broadloom, and then multiply it by the number of times you will have to replace that broadloom. Then compare the figure to what an Oriental rug costs. I’m sure you will realize they make wonderful lifetime investments and can be passed on as heirlooms to your children Because they are portable, they can move with you, they can go over broadloom carpeting or on bare wood or tile floors. I even have one in my kitchen in front of the sink (over my hardwood floor). The ornate patterns hide dirt, dust, spills, and make dog bones look strangely at home! When they finally need a good cleaning, you simply roll them up and take them to the rug cleaners.
For Walls, Think Vinyl. I know, I know—it’s not classy to live with plastic, but for families with little jam smearers it will repay you many times over to install beautiful vinyl wallcoverings rather than paper or paint. Don’t ever put grasscloth or any organic, textured wallcovering on your walls if you own cats; something about these textures seems to cause otherwise sedate felines to commit violent acts of vandalism. Not all wallcoverings need to be patterned as long as they are washable vinyl or vinyl coated. Wallpapers come in a wide variety of washable textures, from fine and filmy to coarse and homespun, which add richness to your room without adding pattern.
For Windows and Accessories, Think “Above Their Heads.” Except for cats who enjoy climbing up draw draperies, most window treatments and accessories are impervious to children and pets if they are above windowsill height. If you know your cat is a curtain climber, substitute another form of window treatment, either Roman shades or blinds. Newer blinds and shades are mostly cordless these days, but if you have window treatments with cords that hang down remember to clamp, clothes pin or tie the cord to itself to prevent toddlers and pets from becoming entangled in or chewing the cords. Patio door windows are continually smudged if you have toddlers (or dogs who think it’s entertaining to catch flies). The only solution I’ve found to this dilemma is to gate off the room, or to install deep louvered shutters (my Airedale dented the daylights out of metal miniblinds, but so far the painted shutters remain unscathed).
Art and accessories need to be above windowsill height. Toddlers are usually incapable of keeping their hands off things that interest them, so don’t even try to keep your beautiful objects displayed on the coffee table or floor until the child is developmentally ready. However, if you can’t put your porcelain on the coffee table, you can display an Oriental screen on a sofa table or hang anything you love on your walls. Toddlers and pets might nibble on small house plants, but large tree-like plants in tall baskets have more impact anyway and are kid and pet-proof. Just to be safe, wedge chicken wire into the pit over the soil of any indoor plan to keep cats from thinking it’s another litter box.
Just because you have young children or pets doesn’t mean you need to sentence yourself to a life without style. Is there anything more appealing than a tabby cat curled up on a chair cushion, or a puppy asleep in a basket in front of the fire? You already value the warmth and coziness that children and pets bring to a home, so go for the rest of it! You can have great style and kids and pets, too!
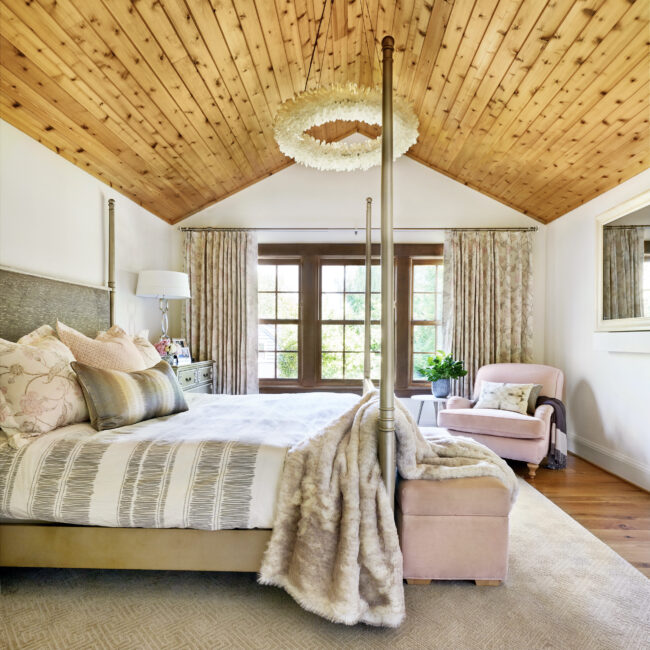
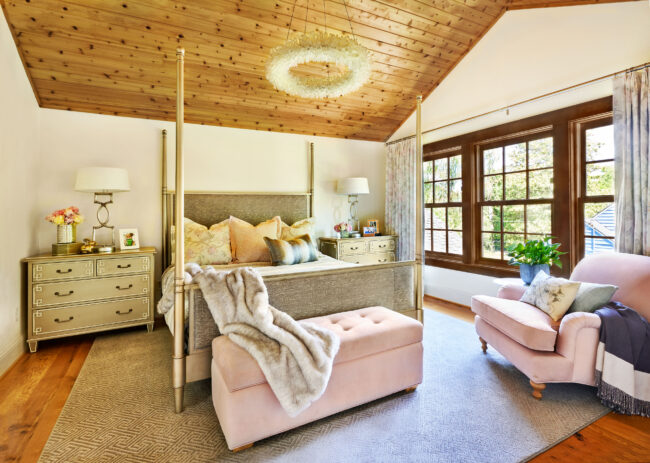
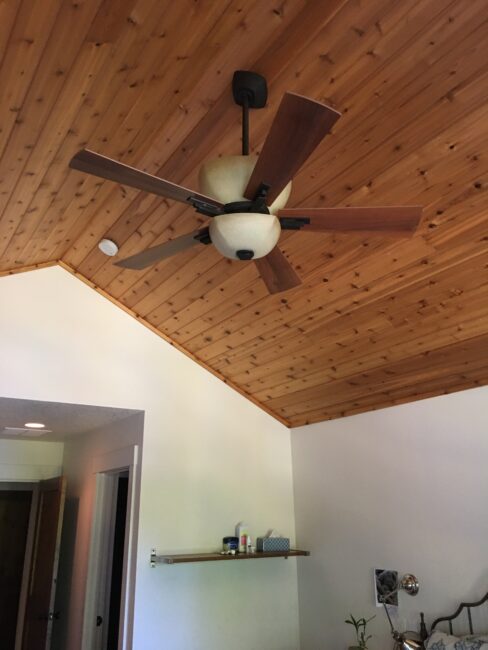
What better way to start the New Year than with a master bedroom makeover that focuses on light. The client had only three requests: make the room lighter and brighter, replace all the current furnishings, and make sure that everything is durable. We listened. The very first thing we were able to install is the magnificent Brazilian rock crystal chandelier, above, which replaced the tired looking fan/light below.
Here’s what the room looked like BEFORE:
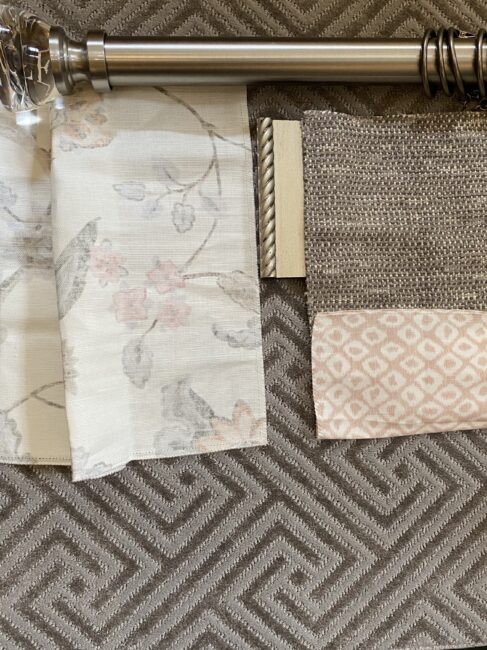
We have developed a palette that glimmers and gleams, as you can see from our mood board below:
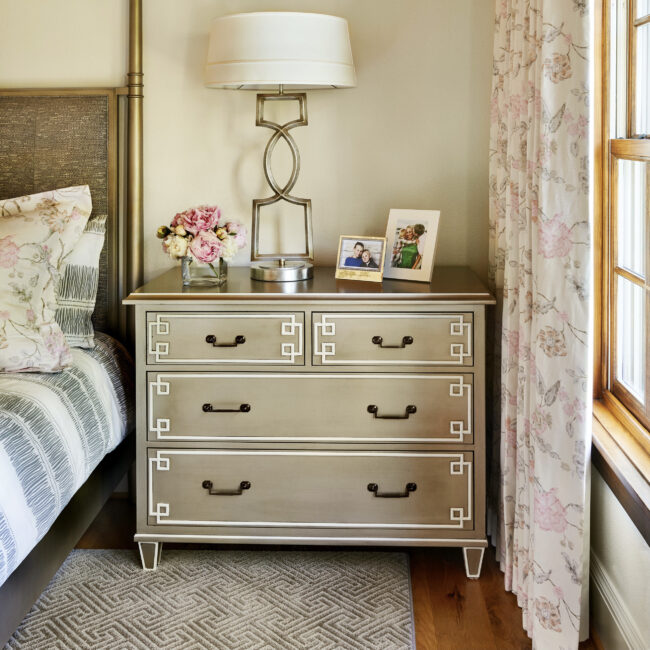
Mood board for master bedroom: Geometric area rug from Masland; ivory printed linen in petal/stone colorway from Lee Jofa for draperies on satin nickel rod with acrylic finials by Kirsch; four poster king bed and night stands in silvery moonstone finish by Hickory Chair.
Because of COVID-related delays the room is still in process. Please stay tuned! The magic has just begun.
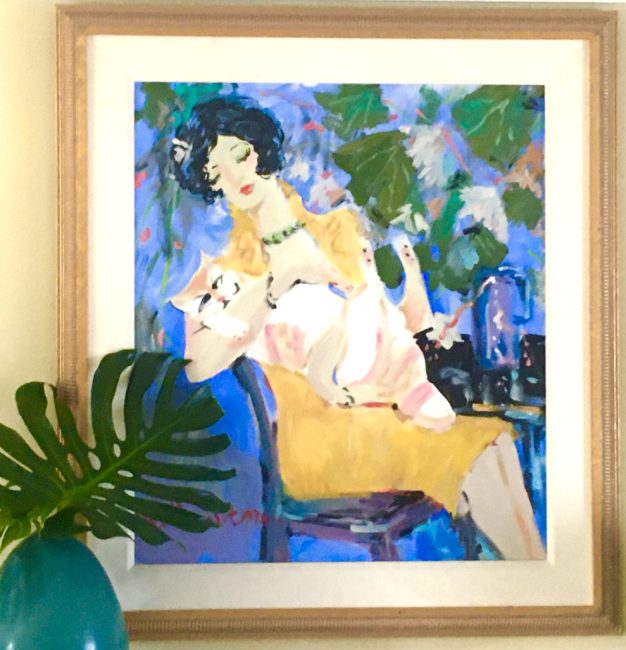
Portland has many fine galleries, and they are well worth exploring, but I’m going to let you in on the best kept secret in town for becoming acquainted with REAL art: the Portland Art Museum’s Rental Sales Gallery (RSG). I’ve used their services many times for myself (see the painting above, presently hanging over my living room mantel), as well as for clients.
The image of the art world is frightening to many people, but the first secret to becoming comfortable with art is being saturated with it. You will gain expertise and confidence simply by soaking up physically all the art your eyes can digest. Besides all the art hanging on the walls of the RSG, they also have dozens of pull-out panels hung with multiple pieces of art, as shown here by RSG Director, Jennifer Zika.
At the RSG, you can choose from over 1500 original works of art by more than 250 regional artists. Mediums include oil, acrylic, and watercolor paintings; wood, metal and stone sculpture; drawings; collages; photography and framed prints. And best of all, you can not only purchase art, but RENT art, with rates starting as low as $40 for three months (renewable for a second term). This way, you get six months to decide whether you want to make the piece part of your personal collection. And if you choose to buy it, the rental fee counts towards your purchase price! For purchasing art, the RSG has interest-free monthly payment plans to make your new original art more affordable. That’s the way I got my G. Hamilton “Big Cat.”
“When the Sky Turns” Marble sculpture by M.J. Anderson
Besides renting to individuals, the RSG rents art to corporations, law firms, hospitals, clinics, financial firms and condos (for lobby spaces). They also offer personal consultation in your home or office at no extra cost. If you need art delivered, they will do that for a fee. The only condition for renting art from the RSG is that you must be a member of the Portland Art Museum, which you can join at the RSG.
Even though many of our clients have fine art collections (I’m preaching to the choir here), I strongly encourage those of you who have no original art hanging on your walls to visit the RSG. They are open every day except Monday, and I have no doubt you will find something that calls to you personally. If you want Emery & Associates to give you assistance, please call us. We believe everyone should live artfully.
If you or someone you know is thinking of moving to a smaller home or a retirement community, here are some tips that will help make your transition smoother.
AFTER photo of small retirement apartment designed by Emery & Associates
1. Start a “TO DO” notebook
Here you will list the tasks that need doing, as well as names of professionals whose services you may need for your adventure. These include packers, movers, contractors, antique appraisers, collectable professionals, vendors, handy people, painters, professional organizers, and interior designers.
BEFORE photo of small retirement apartment. Can you believe the photo above is the same space?
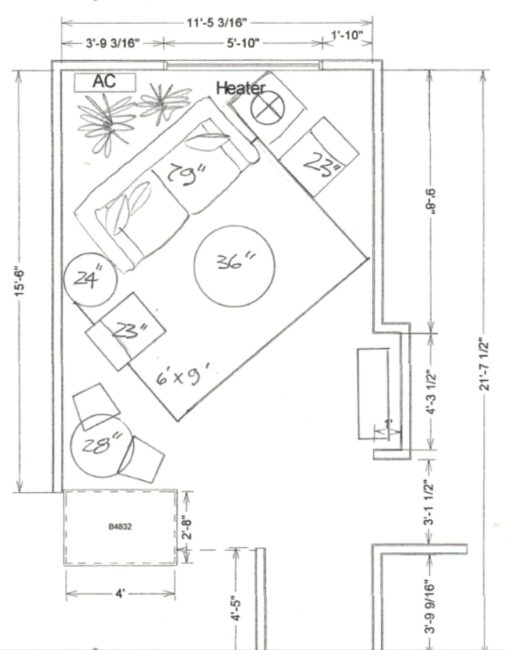
2. Inventory your furnishings
Measure and photograph every item of furniture you believe you want to take with you. Purchase furniture templates at 1/4″ scale from an art supply store or download them from the internet.
3. Make a floor plan
Using 1/4″ graph paper, or working from a plan provided by your community (be sure it’s at 1/4″ scale) place each piece of furniture and area rug you believe you want to take with you to the new living space onto your floor plan.
4. Revise your expectations . . .
Unload anything that won’t fit. Determine which pieces you need to give up, and make plans to sell, give away, throw away, or donate each piece. Enjoy this opportunity to unburden yourself of anything that does not bring you joy (to quote Marie Kondo).
Should all of this appear too perplexing or arduous for you, please give us a call. During the past 25 years Emery & Associates have done numerous projects for clients who are “in transition.” We’ve done apartments and condos for seniors who are downsizing, as well as for middle-aged clients who are going through divorces or other kinds of traumatic changes, most often moving from large homes to much smaller living spaces. We are able to empathize with the client’s angst during these changes, and at the same time help them sort through their possessions with scaled-out floor plans in hand so we can show them what will FIT, literally, into the space, as well as what may need to go away or be replaced. We are confident that you will feel enriched rather than diminished by the experience.
Recently we had the good fortune to transform a client’s master bedroom from lackluster to luscious. There are many ways to do this, but my top three favorites are:
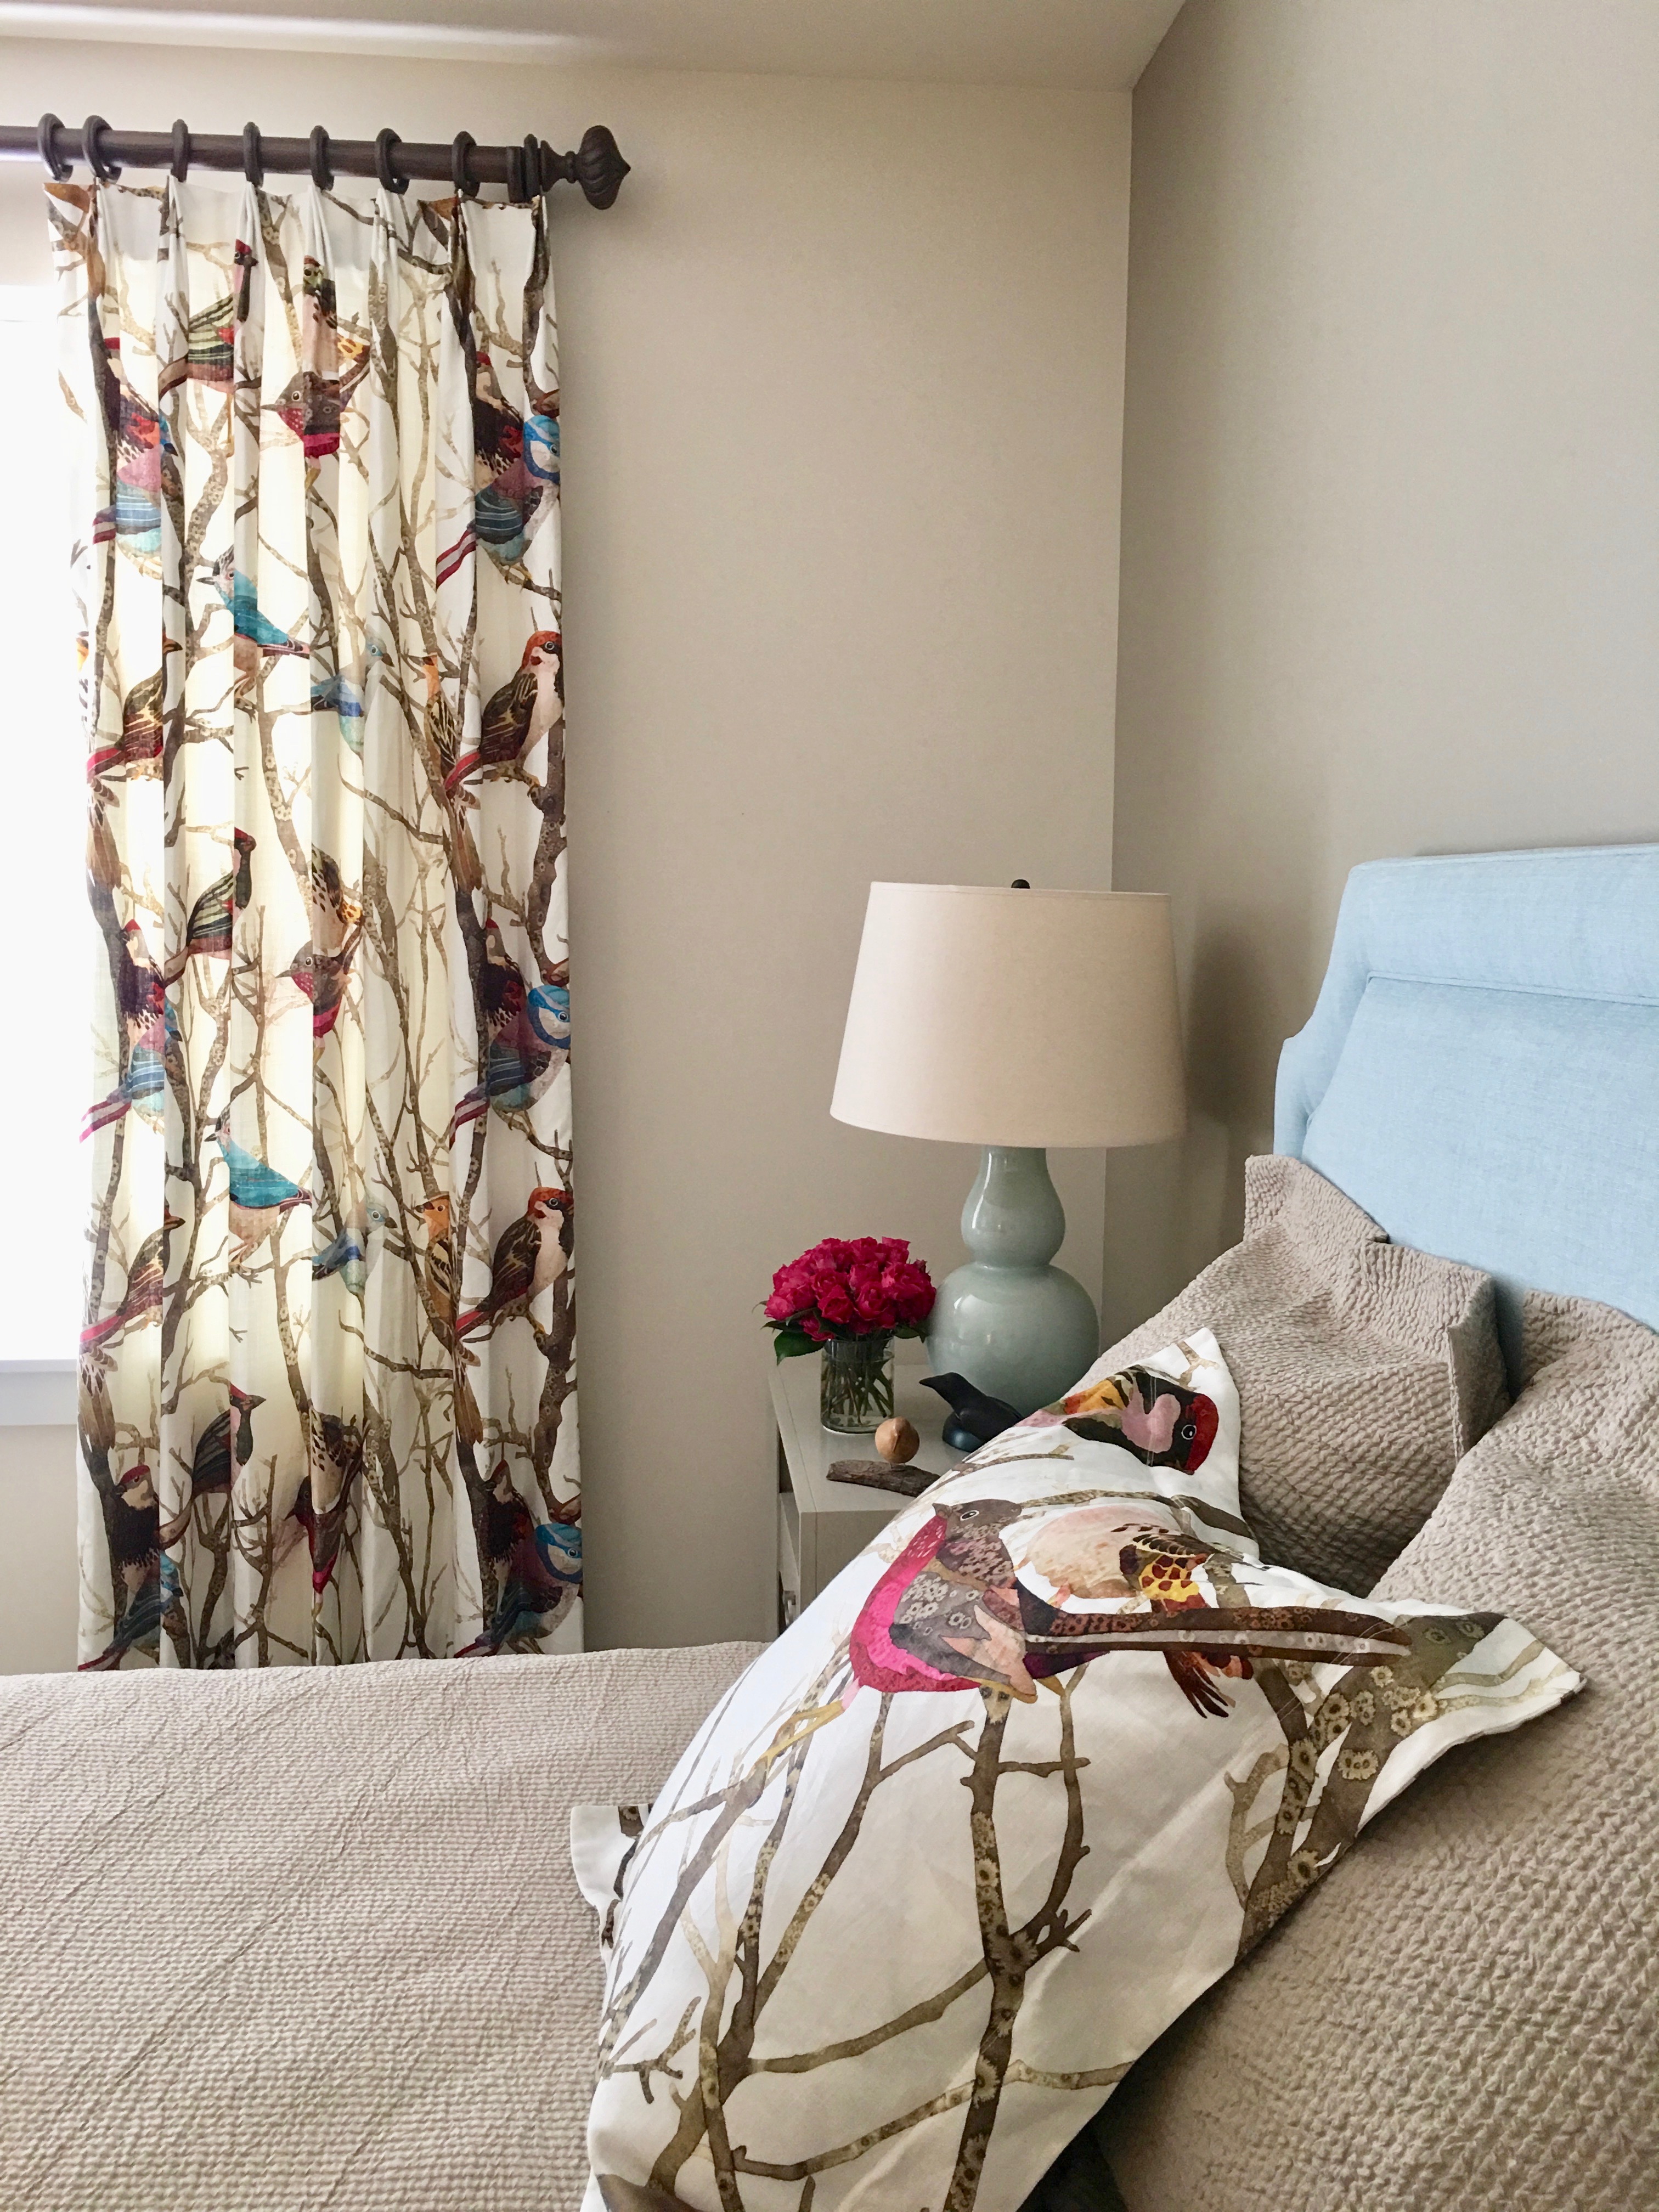
1. Personalize your furnishings. These clients are avid birdwatchers, and recently moved to a condo overlooking the Willamette River that teems with local waterfowl, raptors, and many other birds. They have a large collection of paintings and sculpture that feature feathered creatures of all kinds, and I felt this interest was under-represented in the bedroom. My presentation of the large-scale, watercolor linen by Kravet (“Sparrows”) for drapery was a way to bring their major interest front and center. They loved it, and it kicked off all the other choices.
View of Willamette River from client’s condo
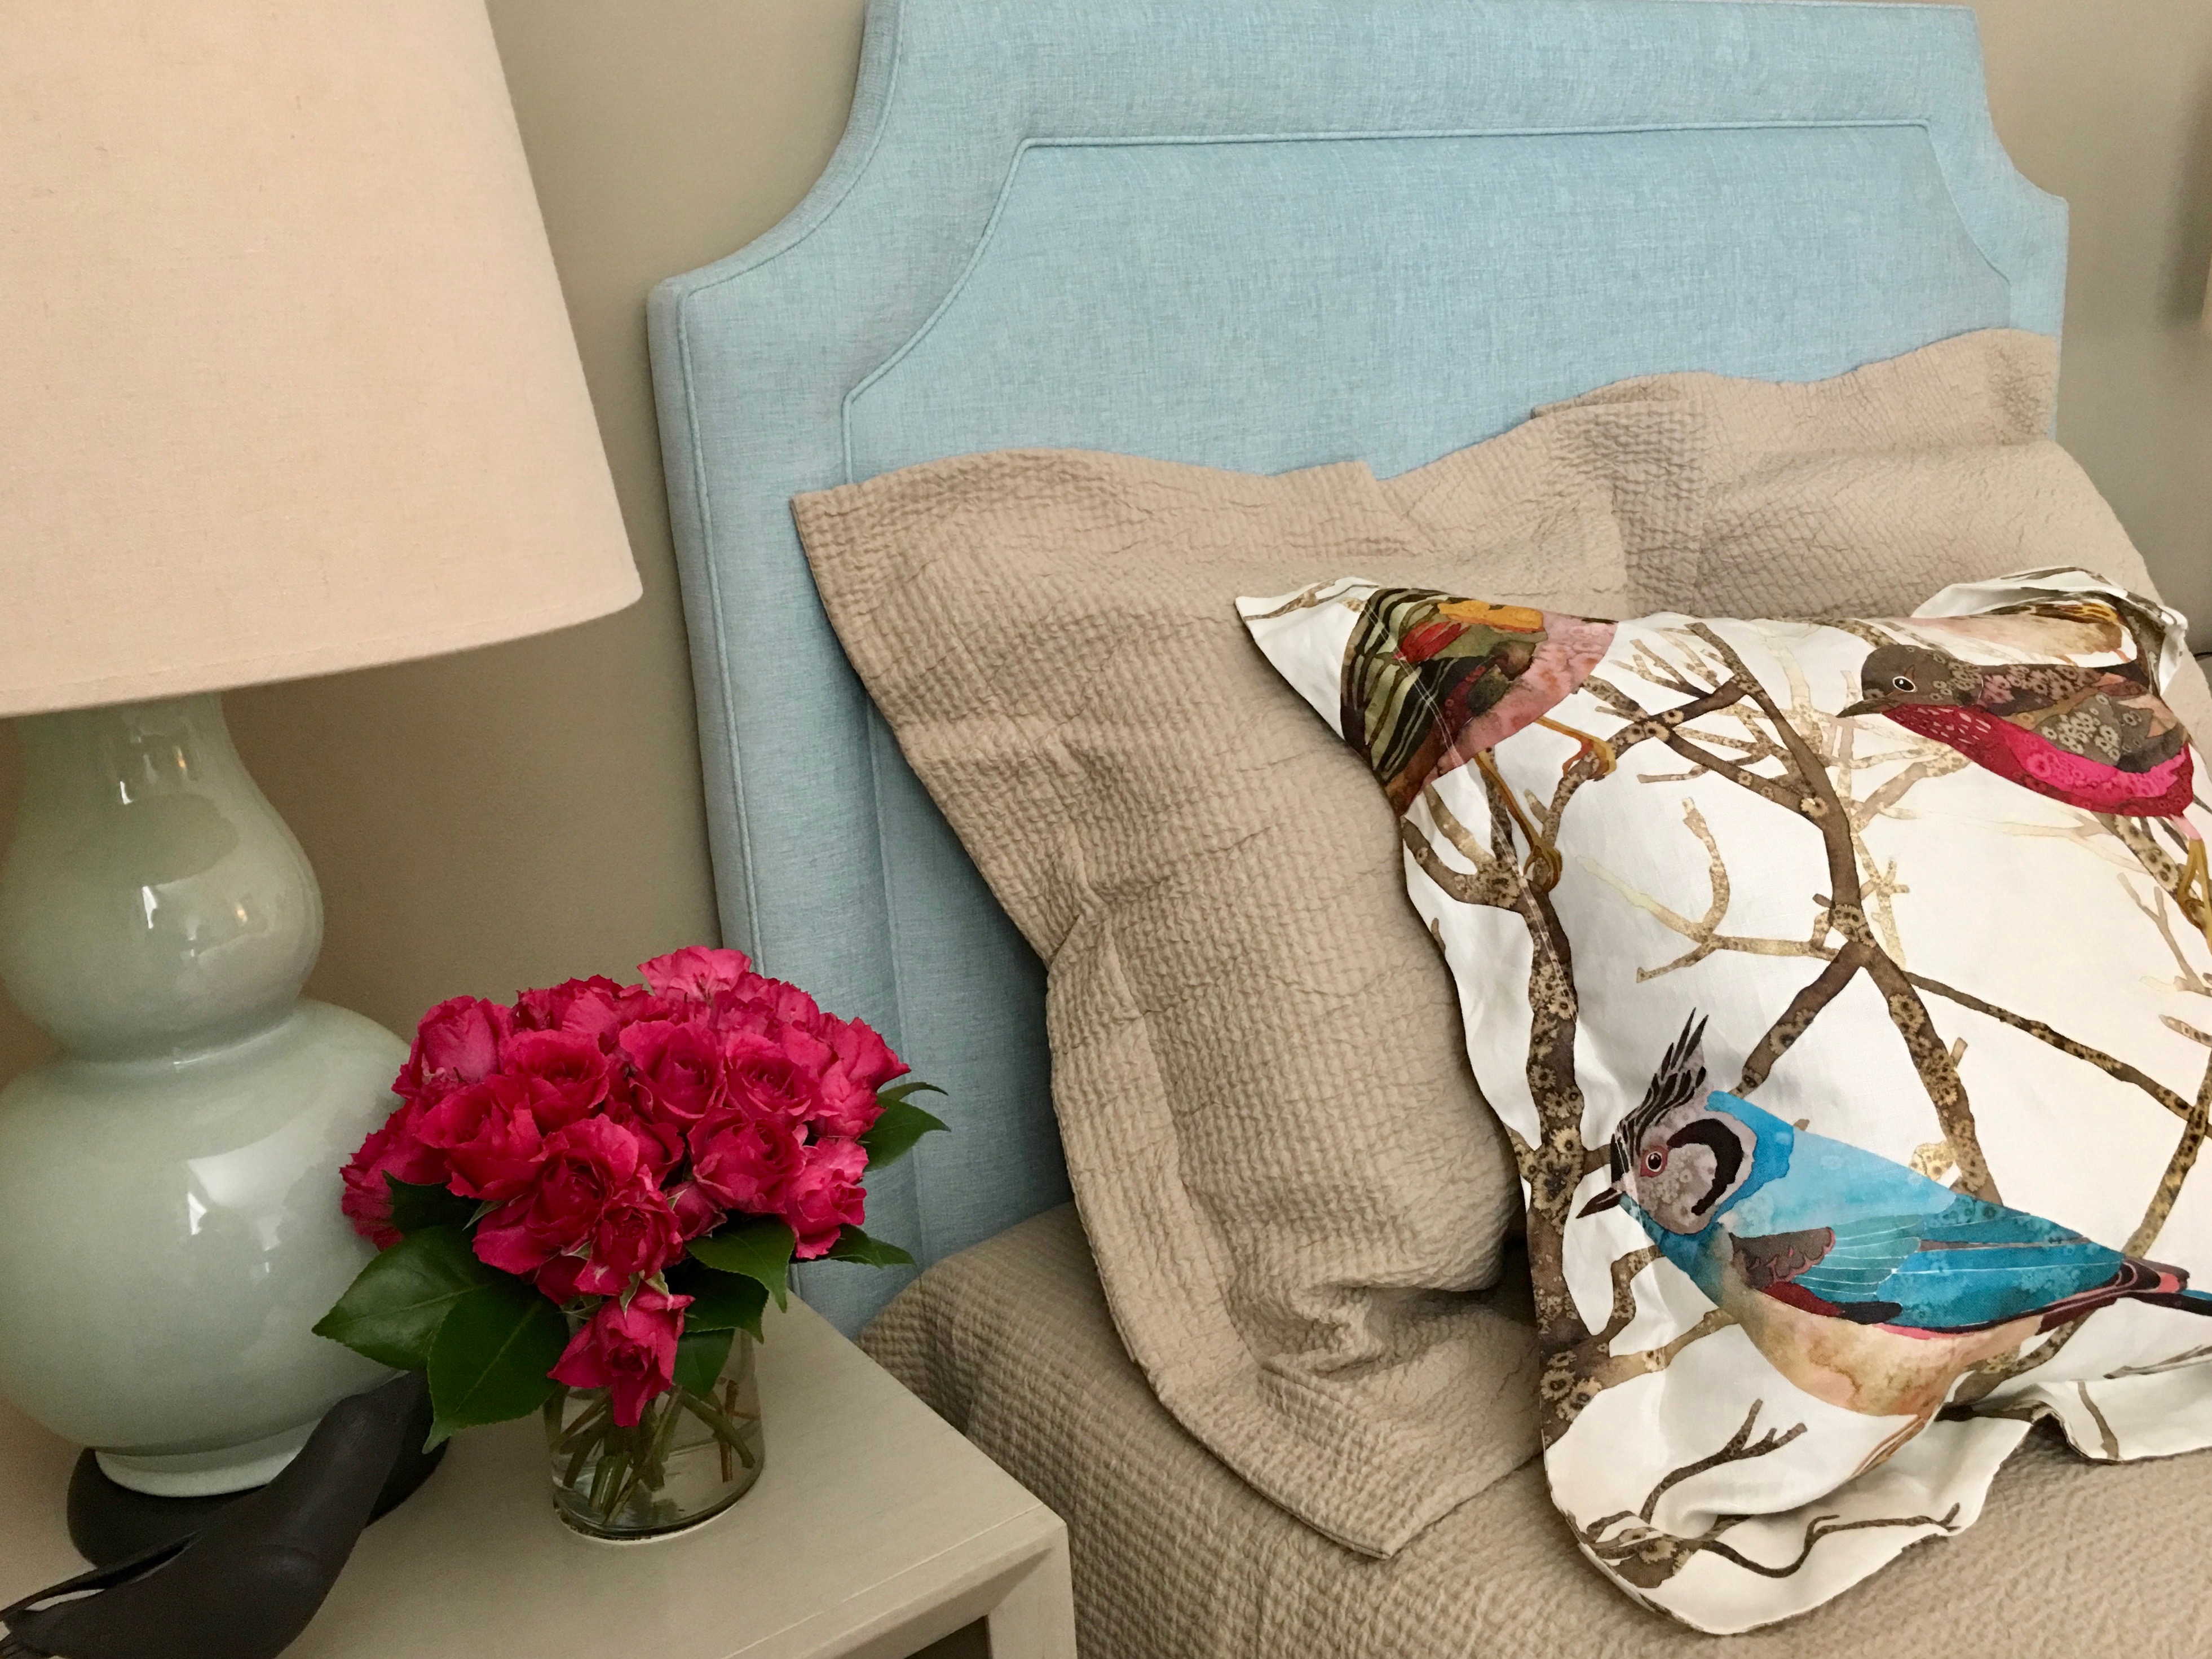
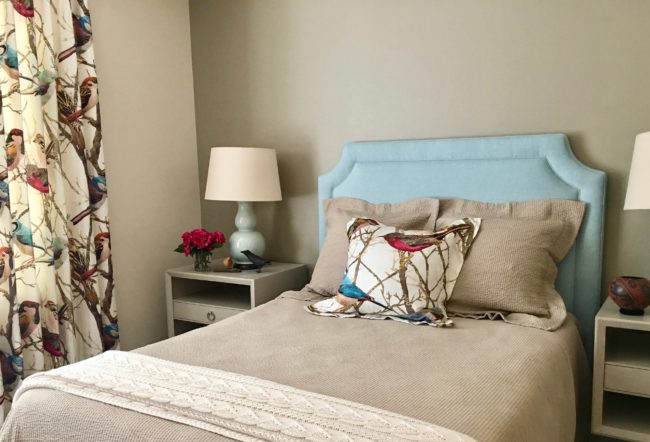
2. Add color! The “before” shot has a little bit of color (celadon green in the lamps and quilt at the end of the bed), but it’s not enough to make this room feel alive and interesting. I like a limited palette, in this case taken from the printed linen: taupe for the headboard wall, aqua on the upholstered headboard and pair of chairs, and a pop of red with flowers. The luxury bedding echoes the wall color and is a serene contrast to the vibrant drapery.
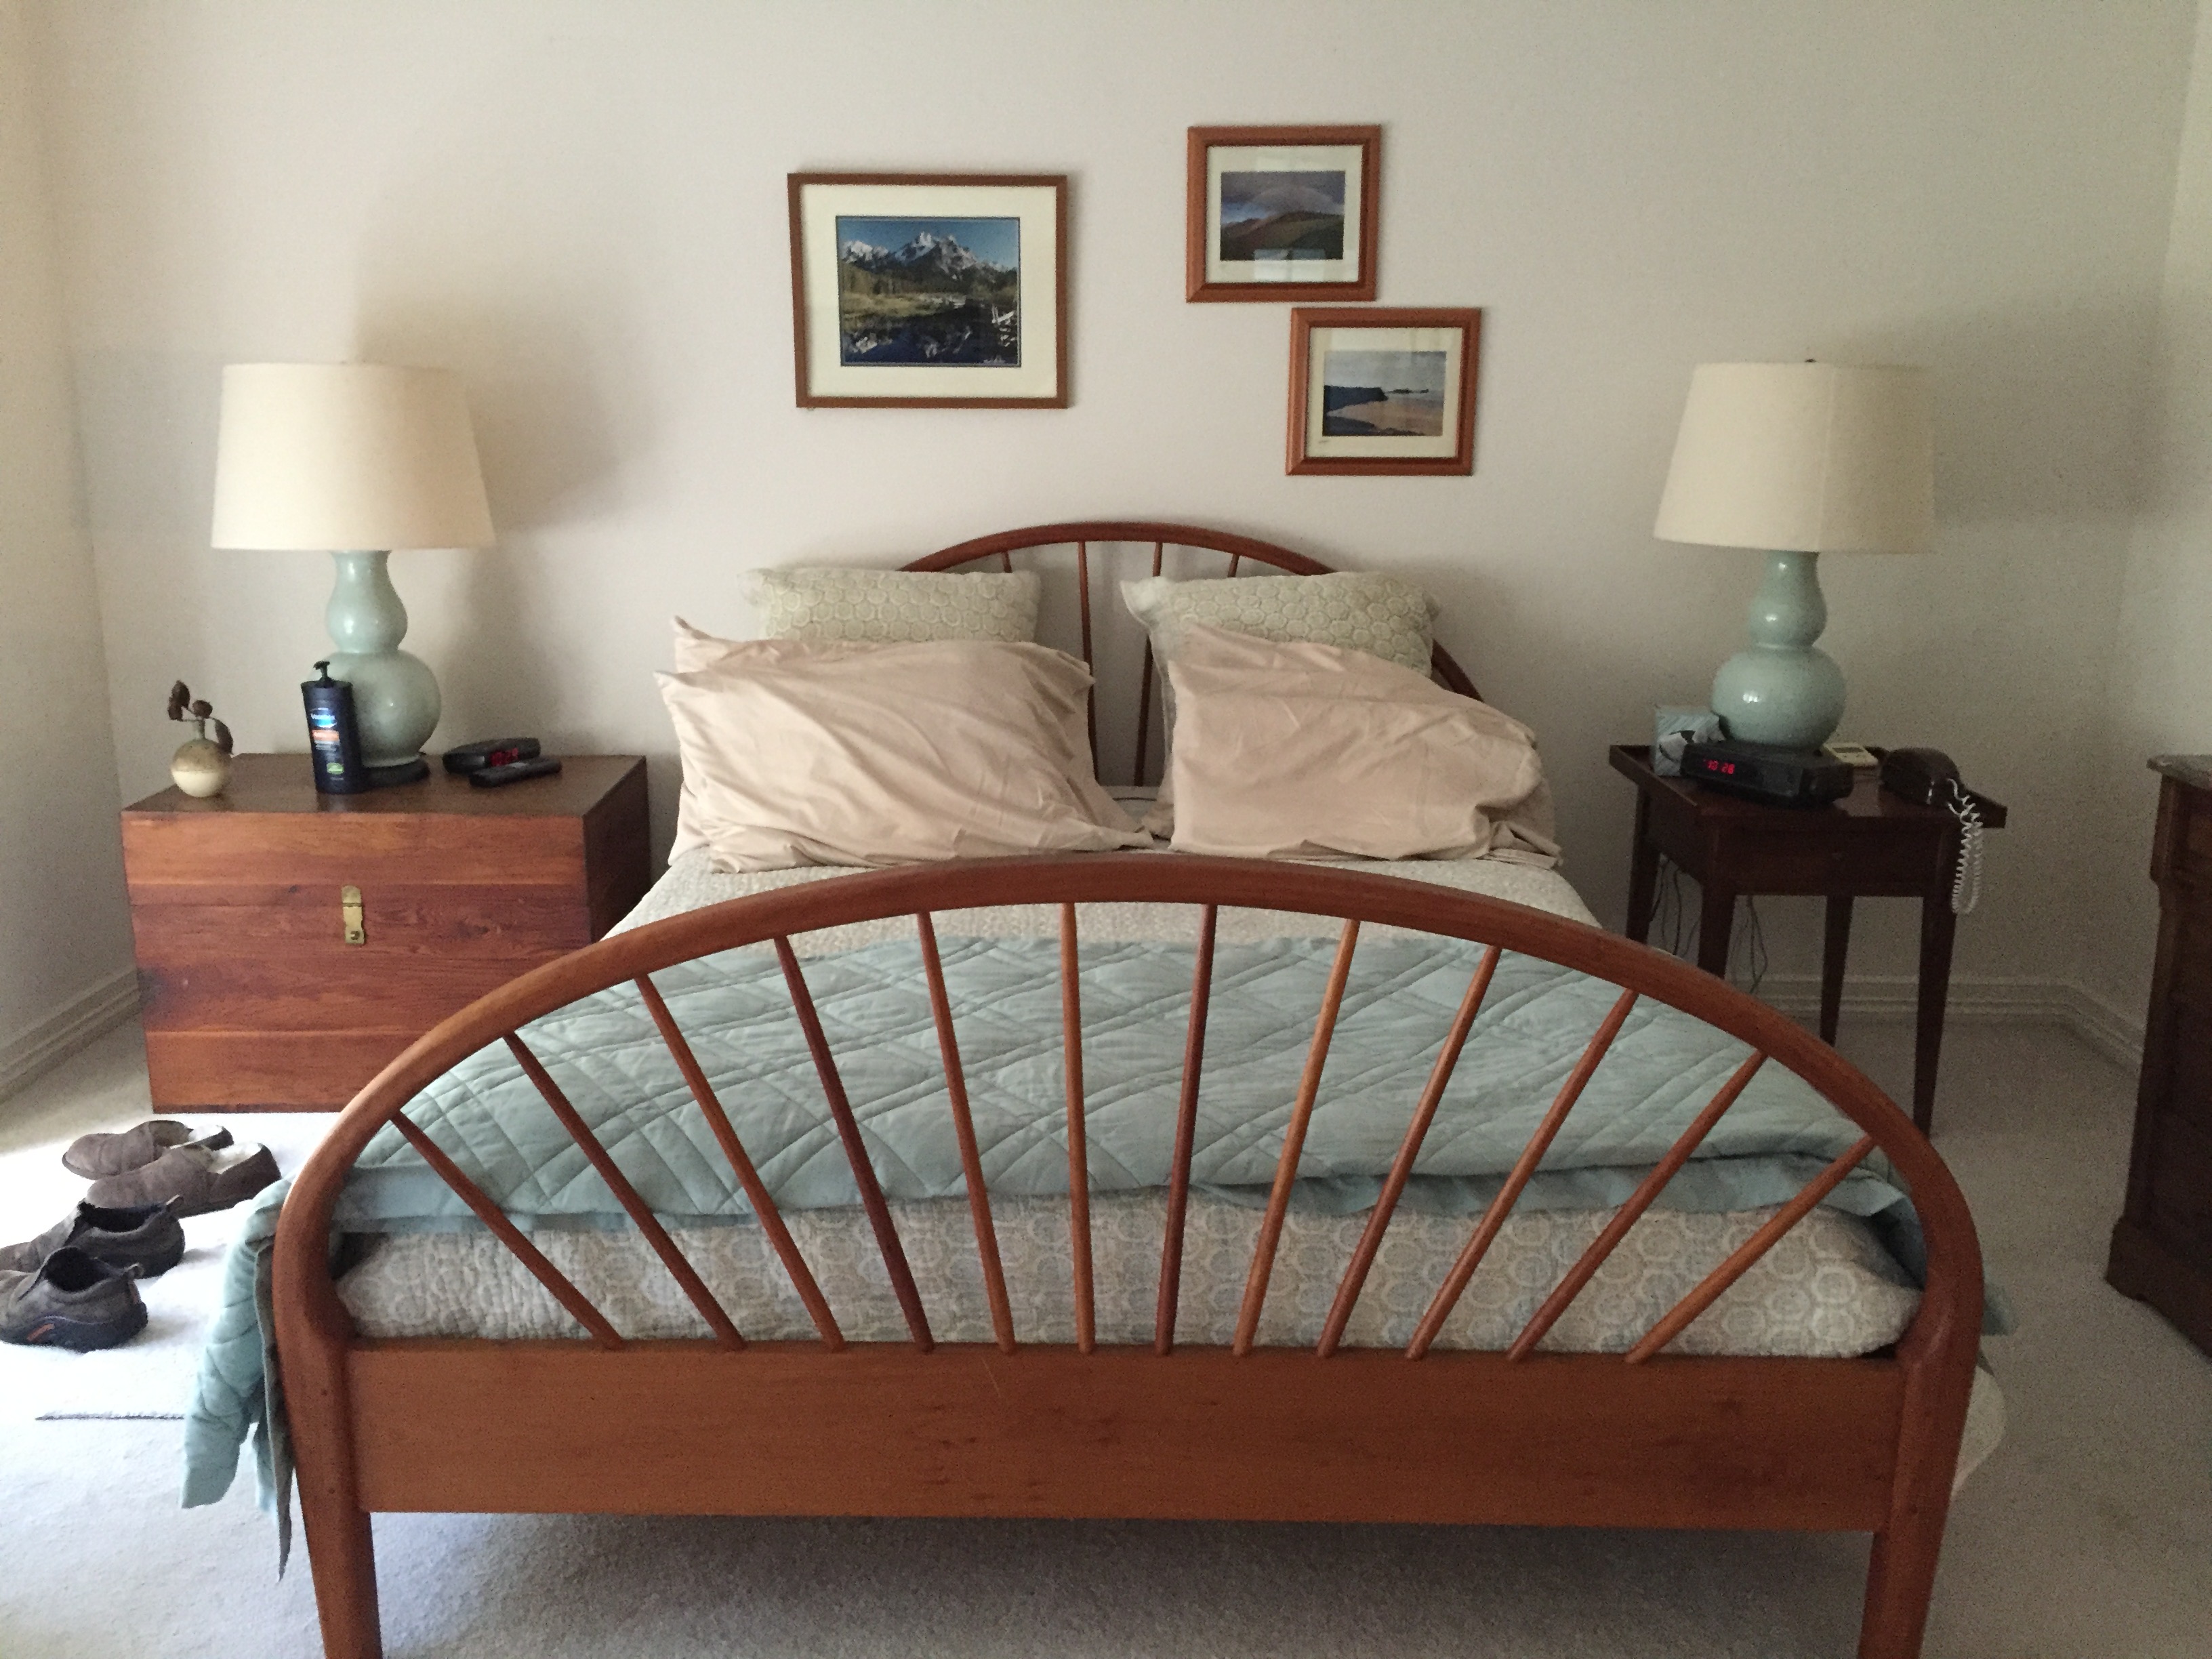
Master Bedroom BEFORE
3. Make sure the headboard is the focal point of the room. In the “before” photo the wooden headboard is mostly hidden behind the bedding, and the art above the bed lacks cohesiveness. We used an aqua chenille for the upholstered headboard (“KravetArmor”), and placed it against the slightly darker wall to create an intimate, cohesive feeling (this figure/ground reversal is something I love to do whenever possible). We also added contemporary night stands flanking the bed in a color lighter than the wall.
Master Bedroom AFTER
Now the room feels inviting, pulled-together, and reflects the clients’ interests and taste. They are thrilled with the results, which makes me very happy. If you feel stumped about how to transform your bedroom, give Emery & Associates a call! We would love to collaborate with you.
My thanks to everyone who worked on this project: headboard/pair of chairs by DFI Custom Upholstery; drapery, Euro pillow, bedskirt by Corby Watkins; drapery installation by Window Coverings Solutions; drapery hardware by Kirsch from Best Window Coverings; nightstands by Woodbridge from Parker Furniture; coverlet and pair of Euro Shams from Manor Fine Wares; painted headboard wall by Peter Weller.
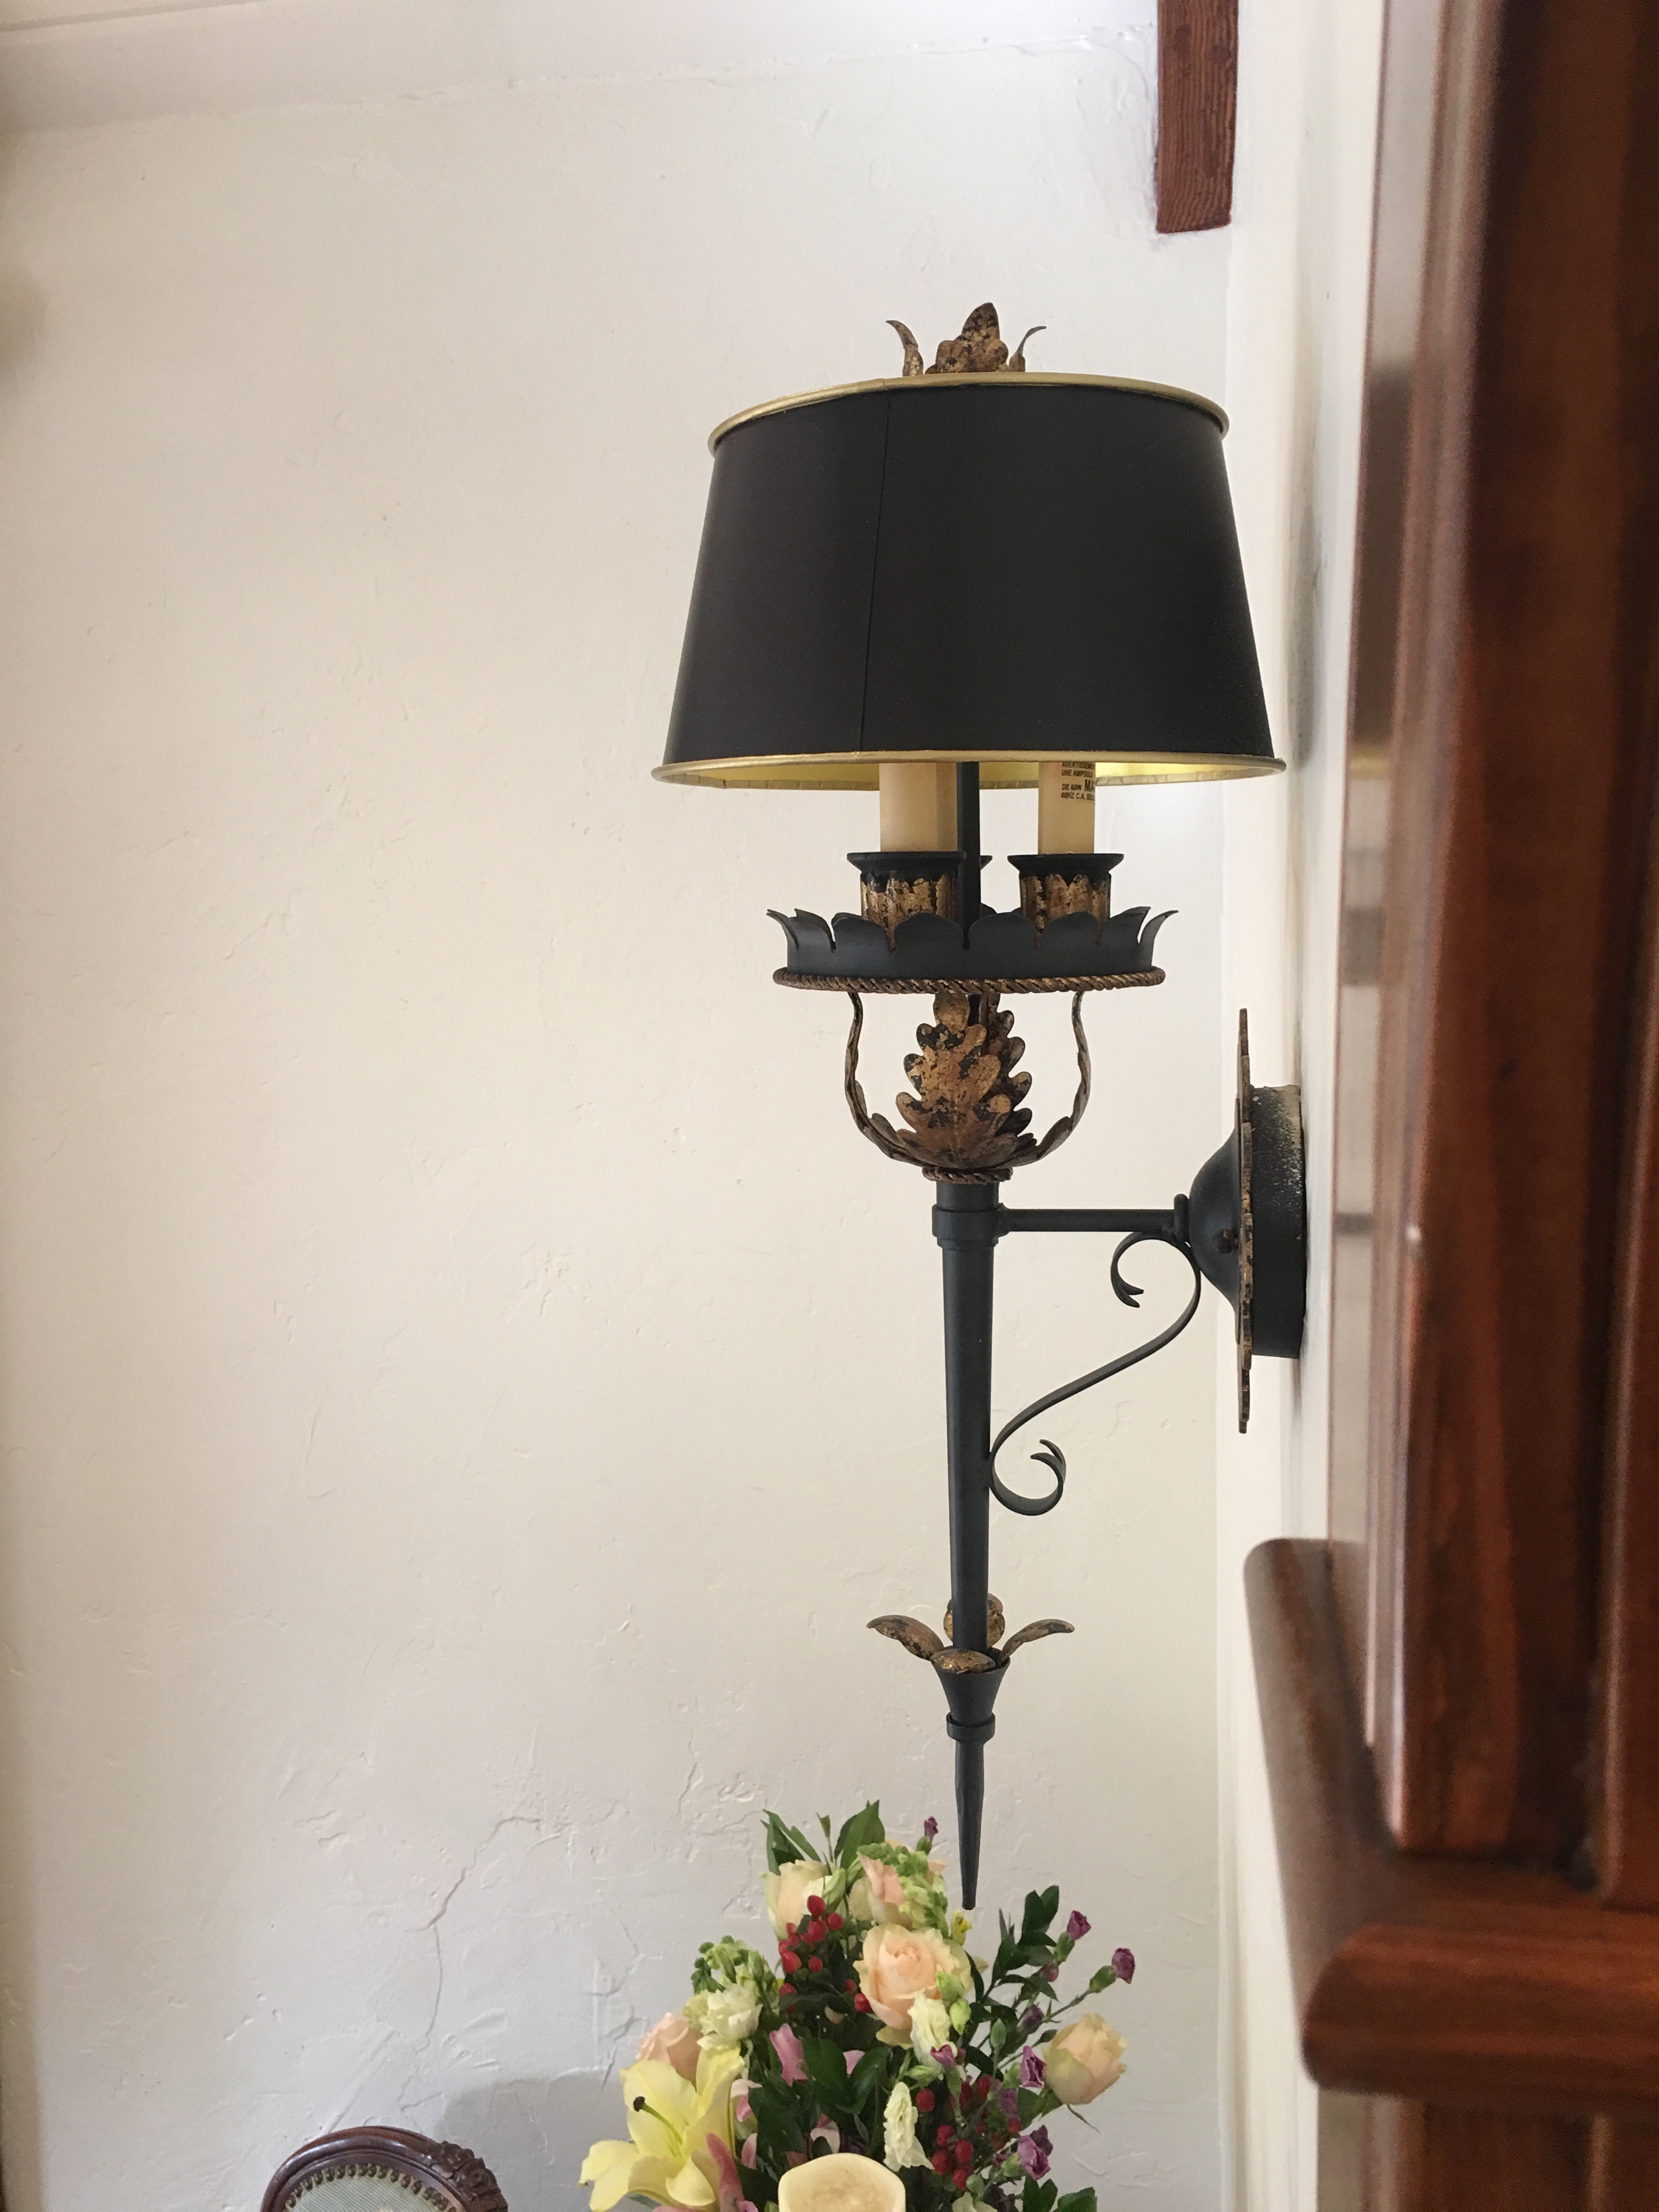
DETAIL: A bouillotte lamp with black tole shade on the round leather-topped table in the bay window adds a traditional touch between a pair of English Regency-style chairs.
This inviting seating area in the sunny bay window looks like it has always been here, but truth to tell, it just happened last week. That is, the completion of the room happened last week, but was actually year in the making.
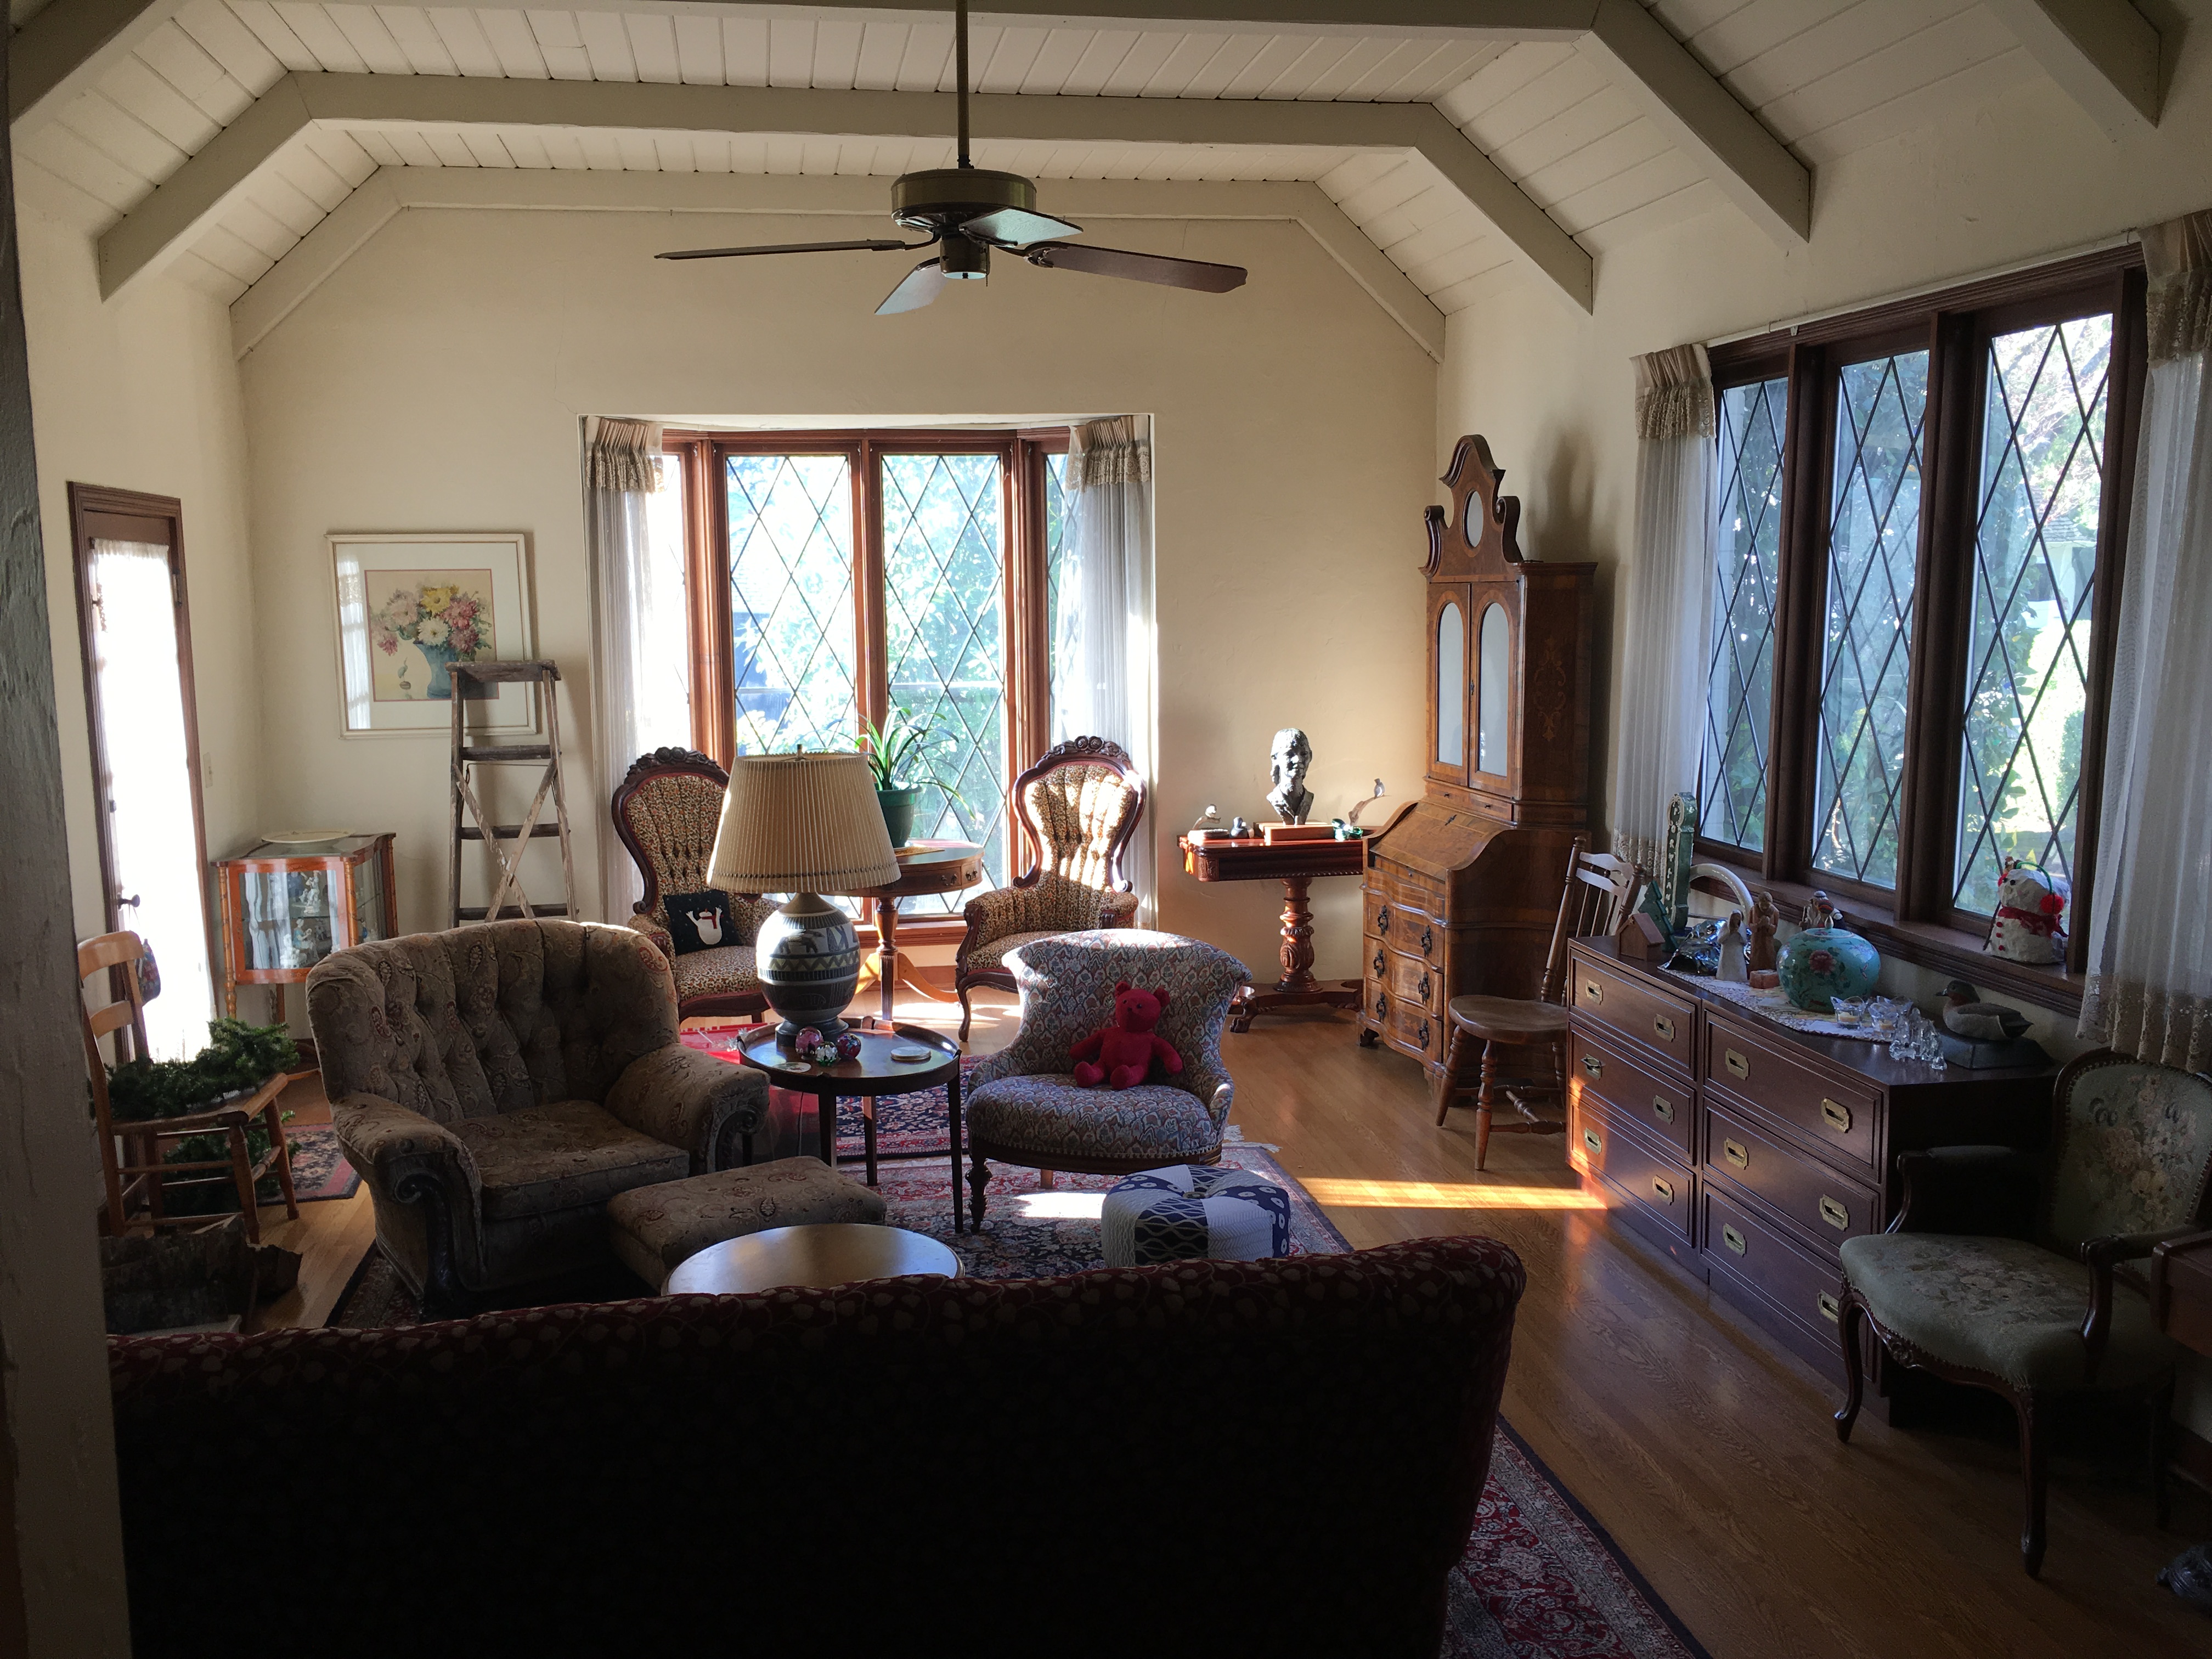
Let me back up to show you what the living room of this 1930s Tudor-style home looked like when I first visited the homeowners.
BEFORE–Living Room (view from entry)
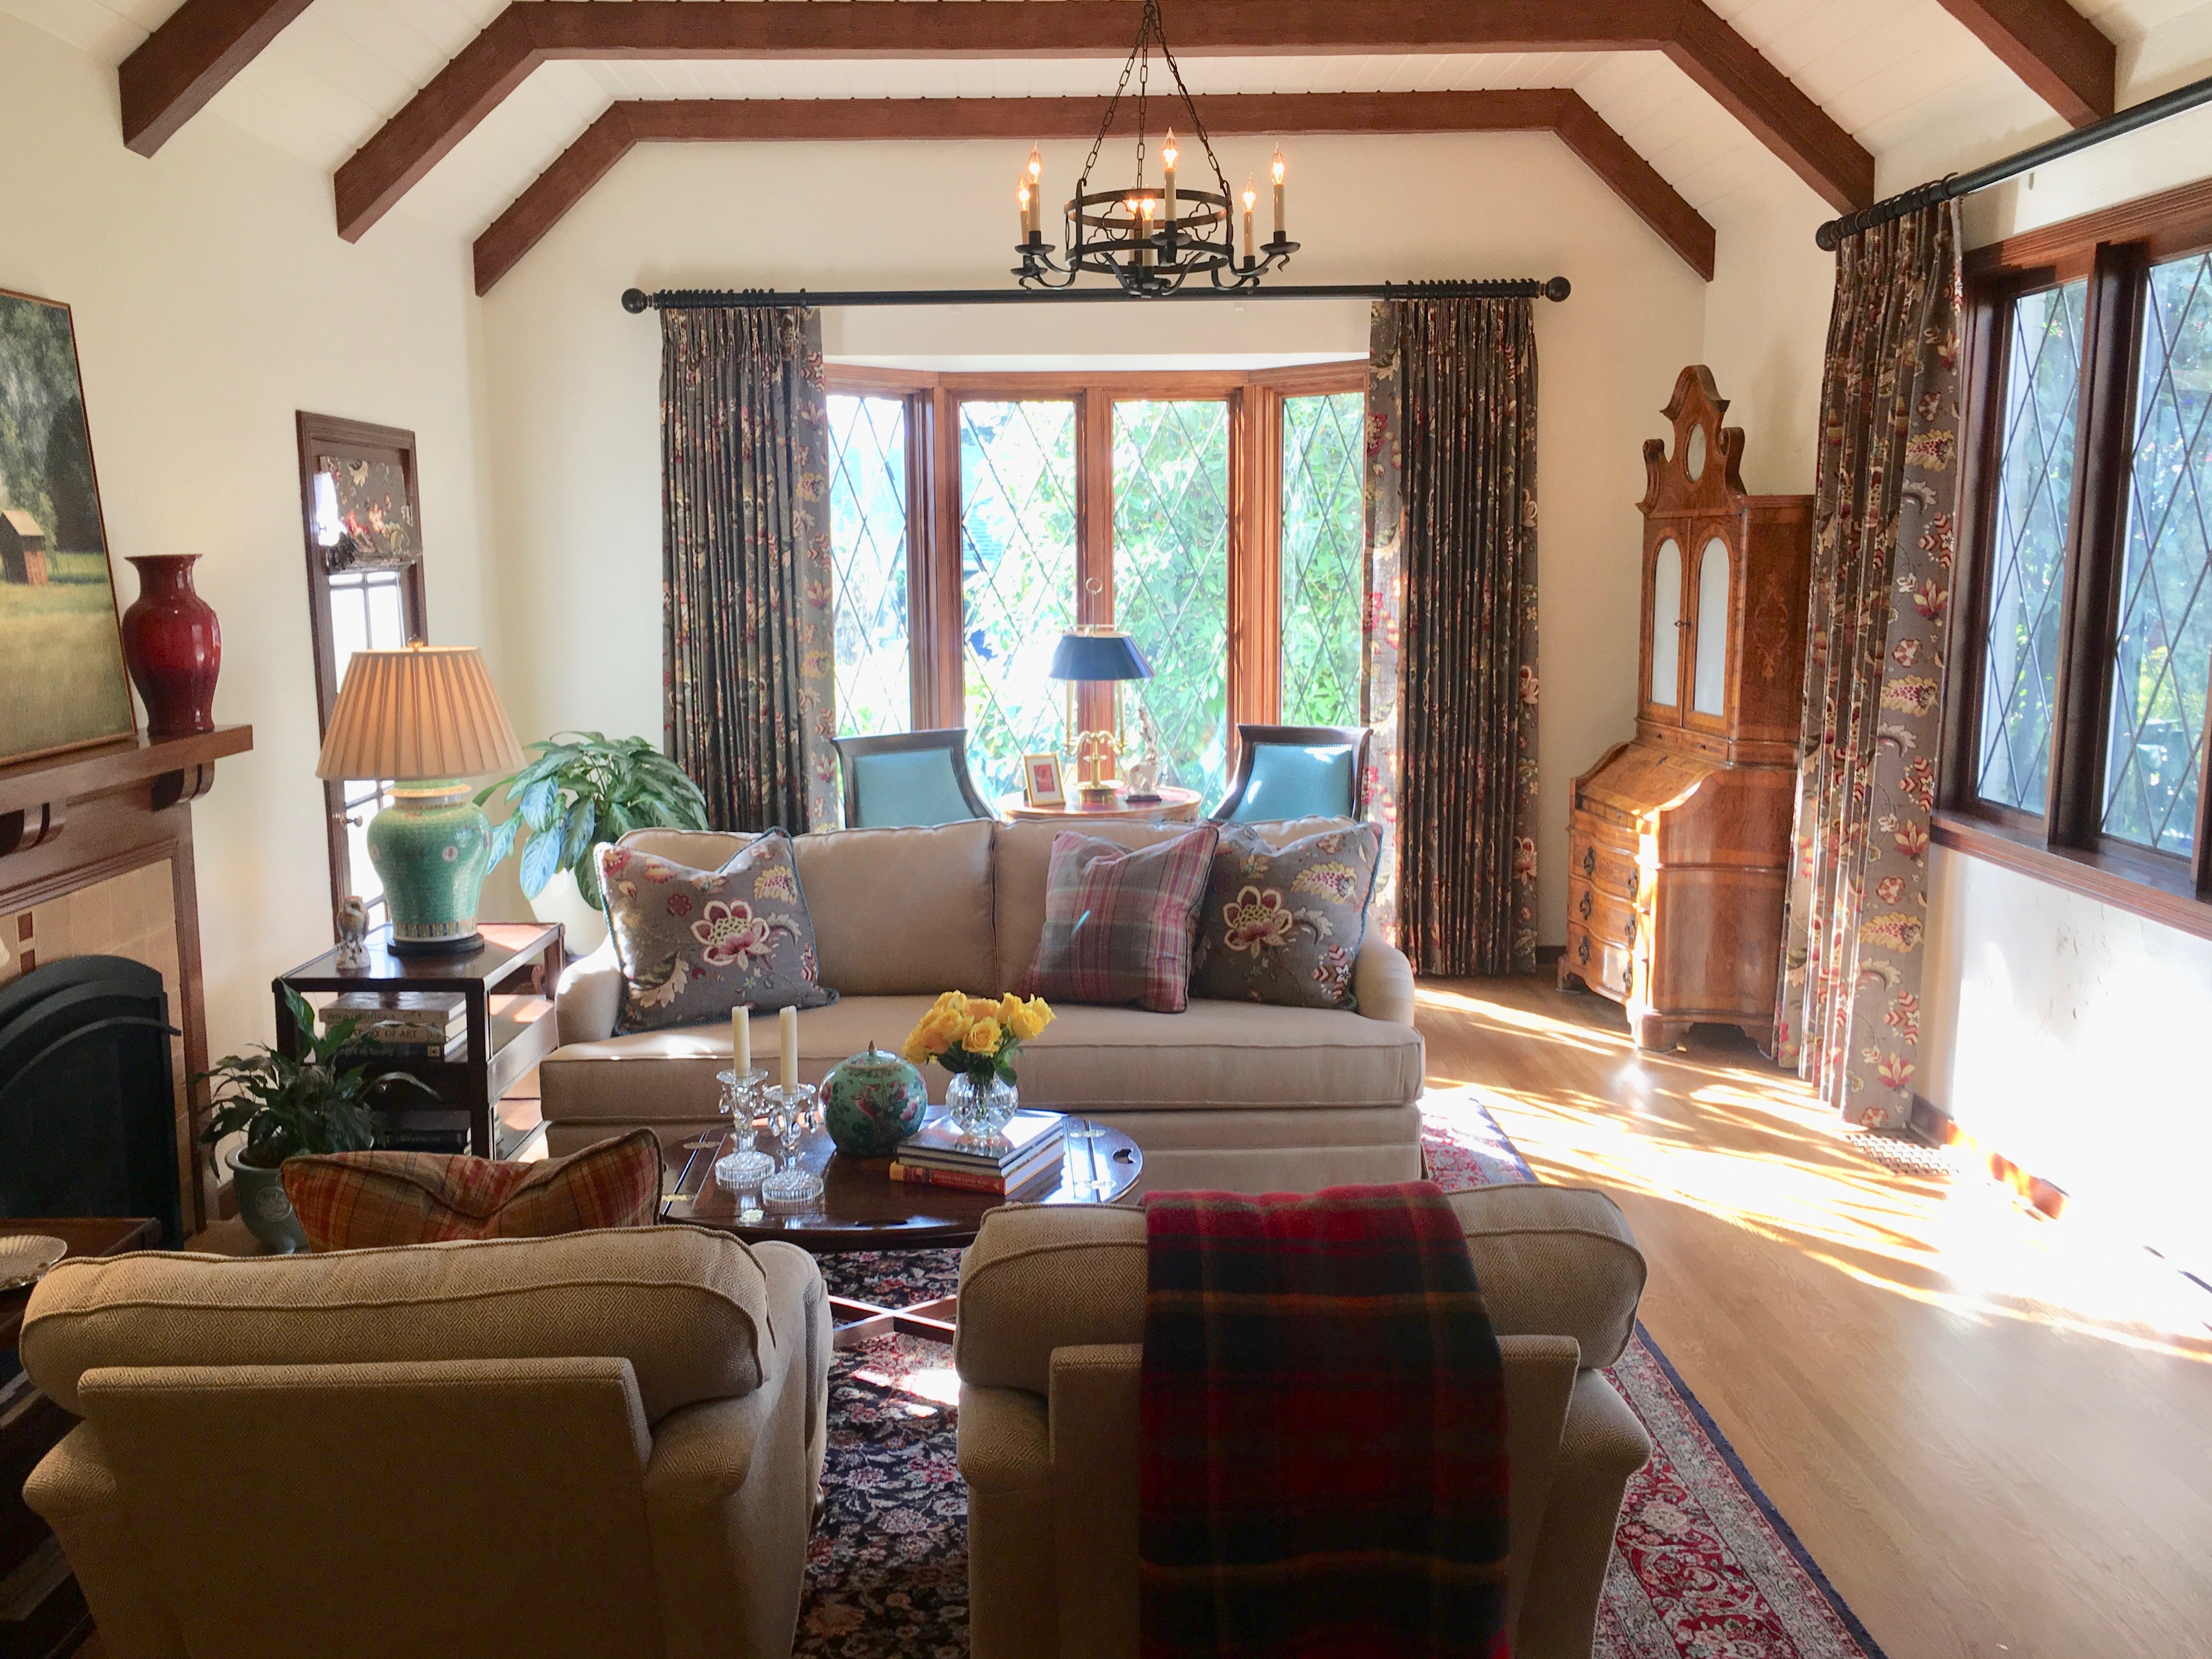
The homeowners told me they wanted to bring the painted ceiling beams back to the original wood color, replace the ceiling fan with a chandelier that fit the style of the house, and have some help with the furniture. It was obvious to me that the bones of the room were good, and their idea of having the ceiling beams faux finished back to the color of the original wood was a good one (and more economical than replacing the beams). Their collection of furniture desperately needed curating, since they owned many fine antique pieces that I felt should stay, but too much Victorian upholstery that made the room feel overstuffed and tired. The one big lamp in the middle of the room gave the only light, so at night it was dark and cold. It was the least-used room in the house, and since the homeowners had both just recently retired, they wanted to be spending more time in this room and to entertain friends and family here. Addressing all of these issues resulted in the changes shown in the photo below:
AFTER–Living Room (view from entry)
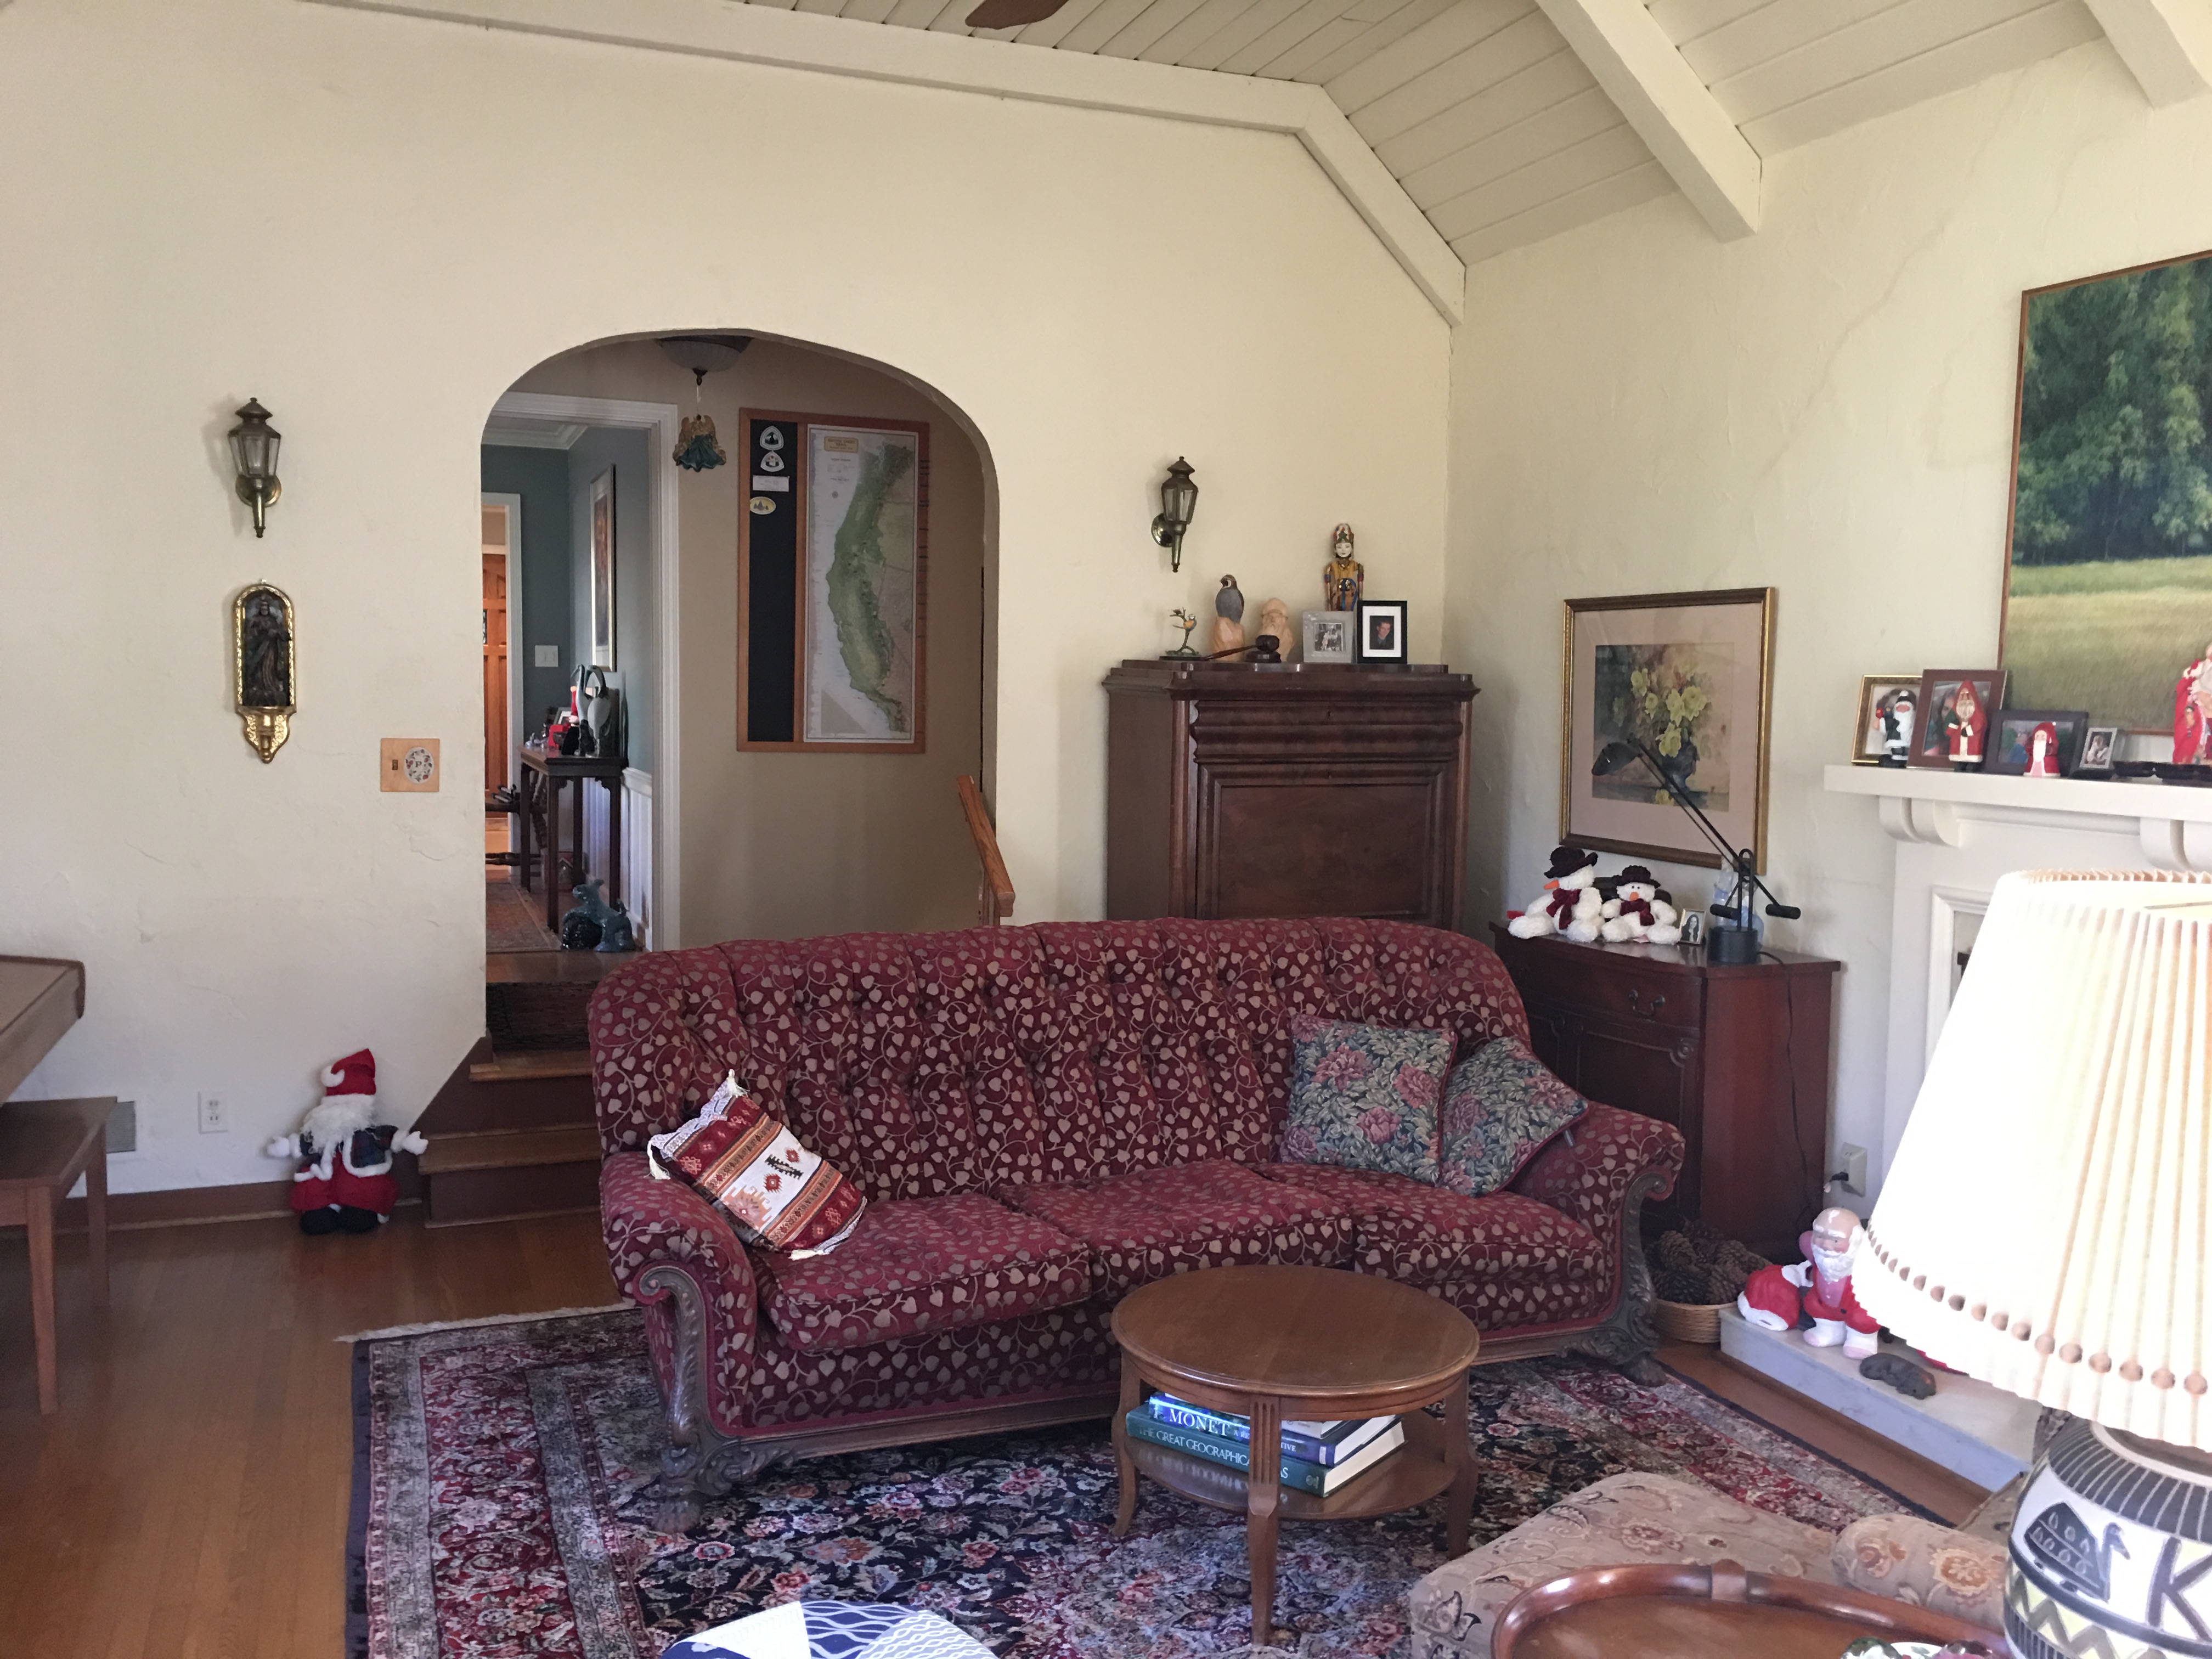
Moving to the opposite end of the room, this is what it looked like BEFORE:
BEFORE: View from bay window end of living room
I suggested trimming out the arched opening to the entry with wood to match the existing wood trim. I can’t say enough good things about the artist who faux finished the beams and fireplace mantel: Philip Emmerling. The dark wood now emphasizes all the traditional architectural aspects of this space in a consistent and coherent way. I also found some handsome sconces that really made a statement on either side of the arched opening, and we added recessed lighting into the ceiling as well.
AFTER: View of living room toward entry
DETAIL: Sconces flanking arched entry
As with any remodel of an old house, this one took some unexpected twists and turns. The homeowners had planned on having the floors refinished, the walls and ceiling repainted, and the beams and mantel faux finished. What they had NOT expected was some expensive foundation work that became necessary, as well as having to replace the leaded glass windows in the bay.
The fireplace was another significant change. Not only was the mantel brought back to look like the original wood, but the owners decided to convert the wood-burning fireplace to gas. The new Batchelder-style ceramic tile from Pratt & Larson gives the fireplace a vintage look, and the iron fireplace screen adds a graceful curve.
BEFORE: Fireplace detail
AFTER: Fireplace detail
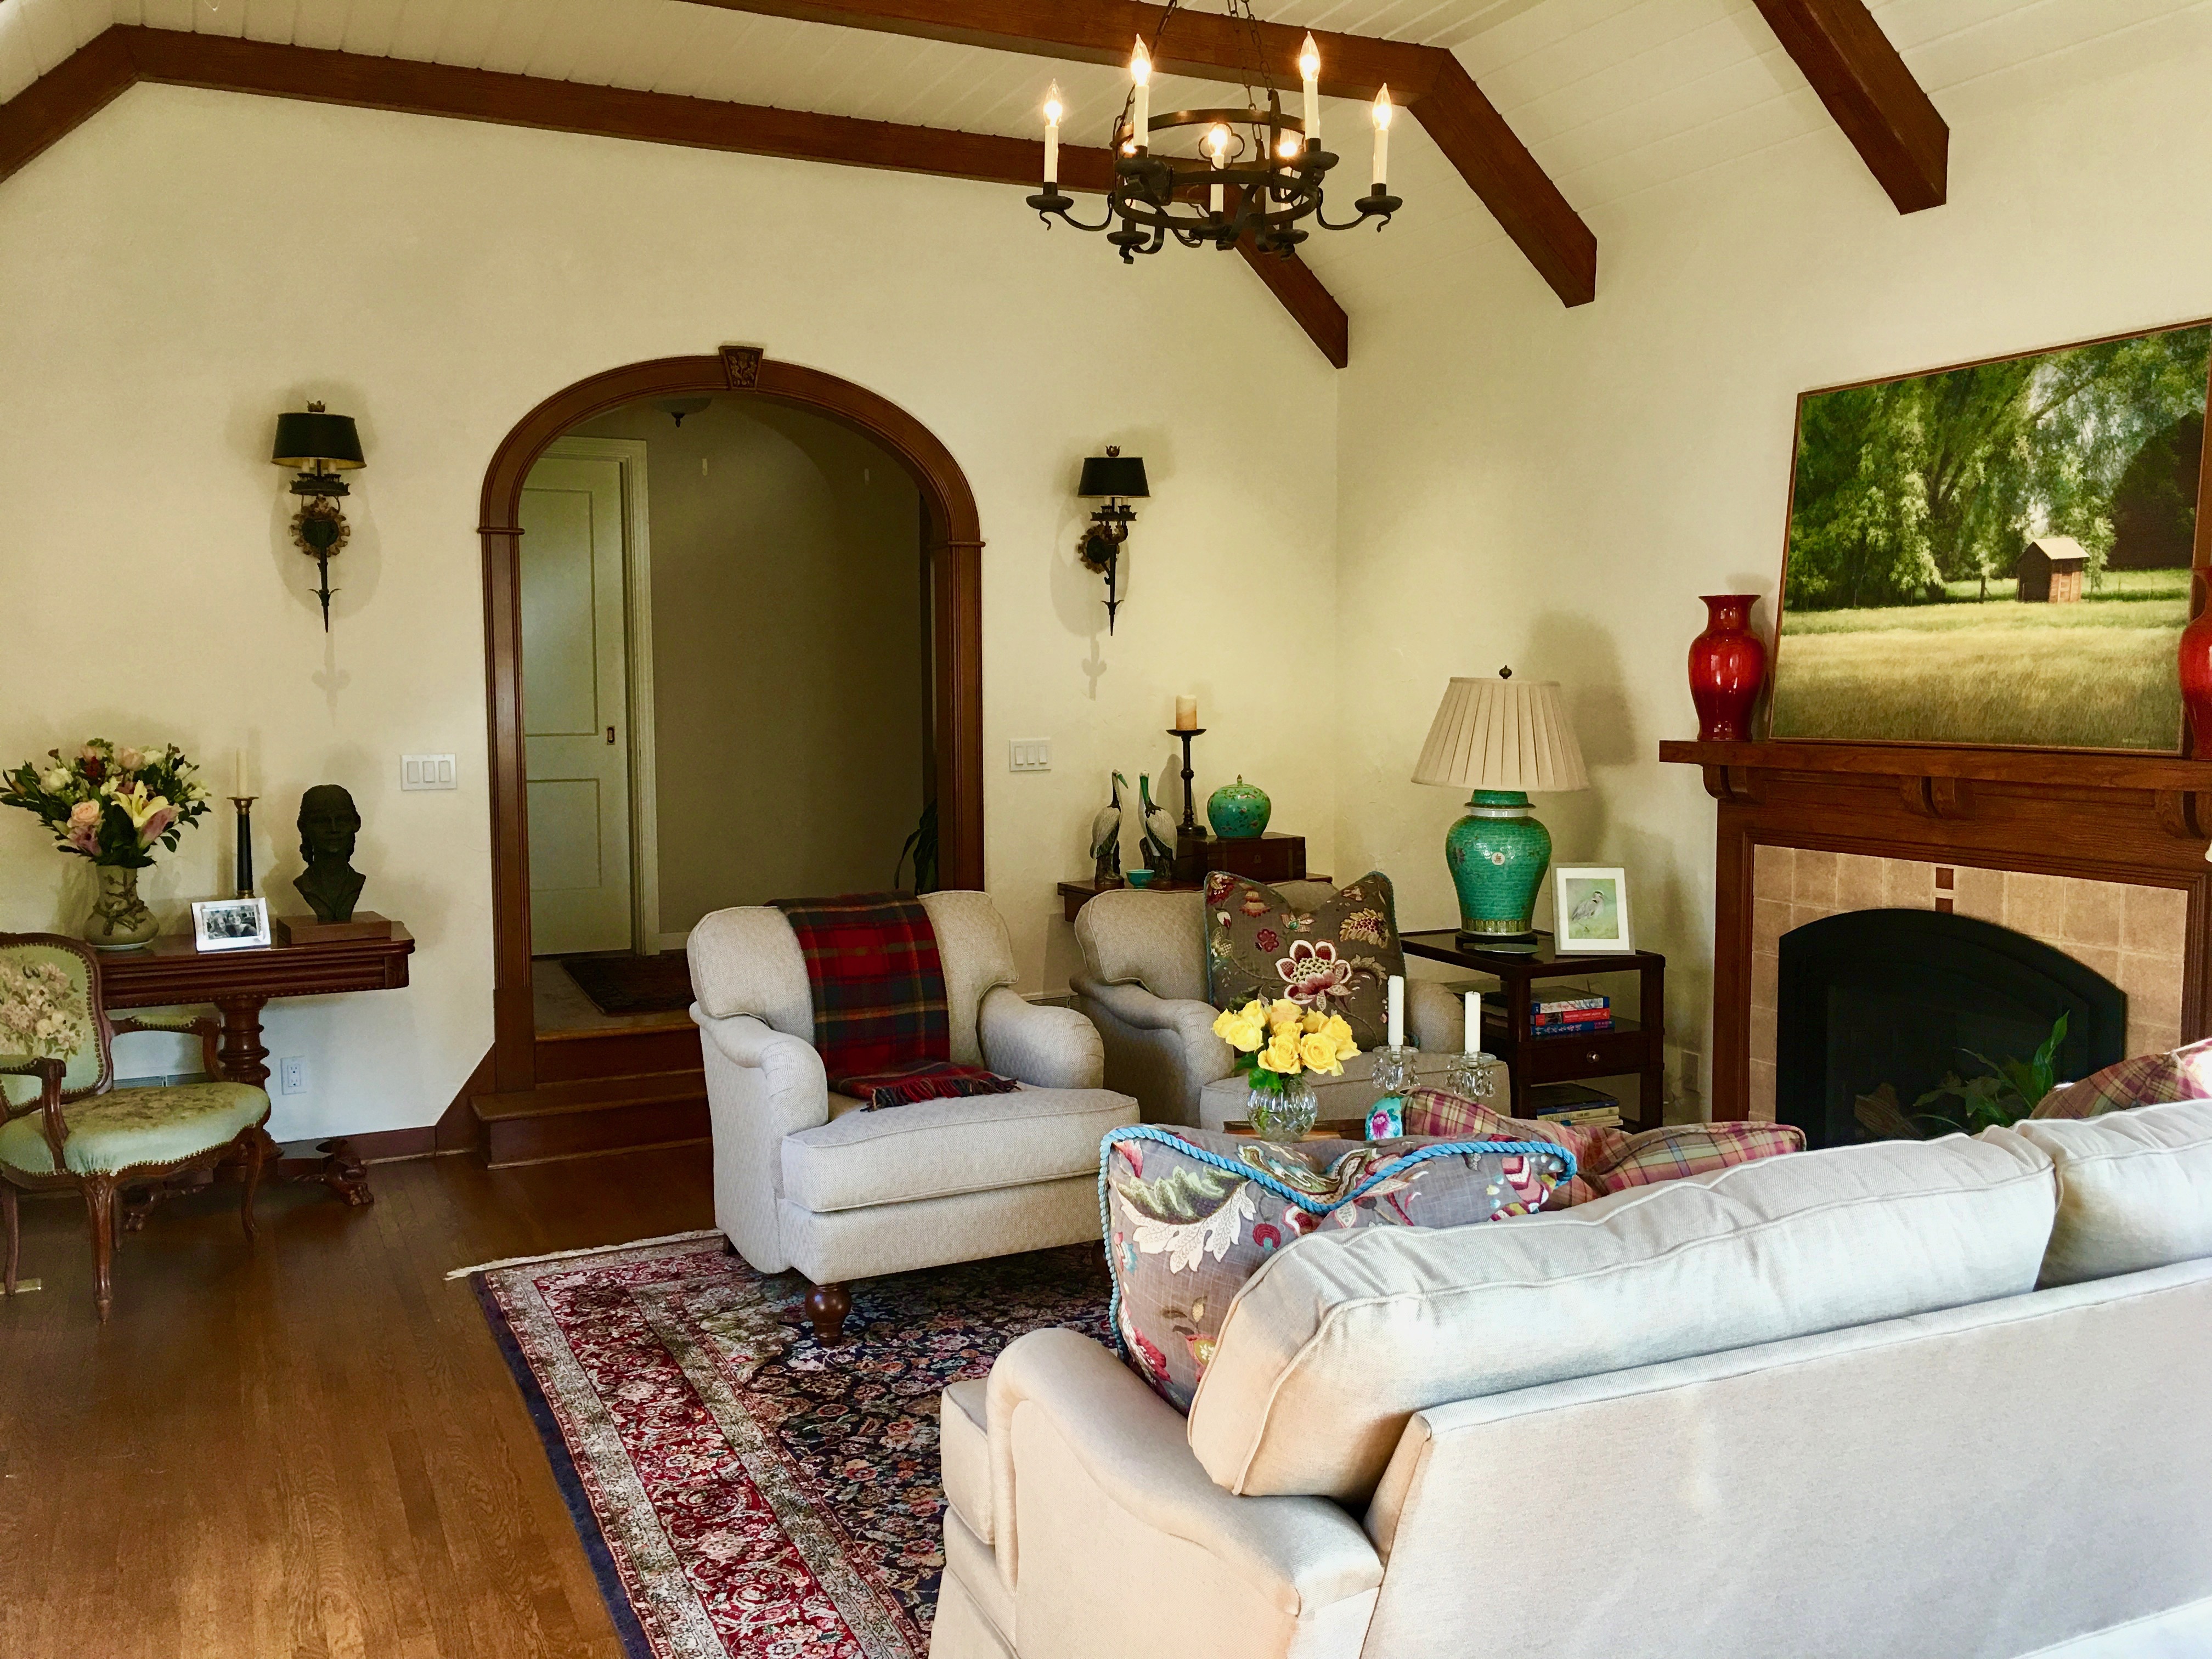
Because the owners wanted their living room to express their Scottish heritage, the craftsman who did the arch keystone carved a rose on the entry side and a thistle on the living room side. We also added tartan fabrics for pillows, and a wool throw that represents the homeowners’ family clan. Lamps custom-made from porcelain temple jars repeat the color of porcelains in the homeowners’ collection.
DETAIL: Keystone carving of rose
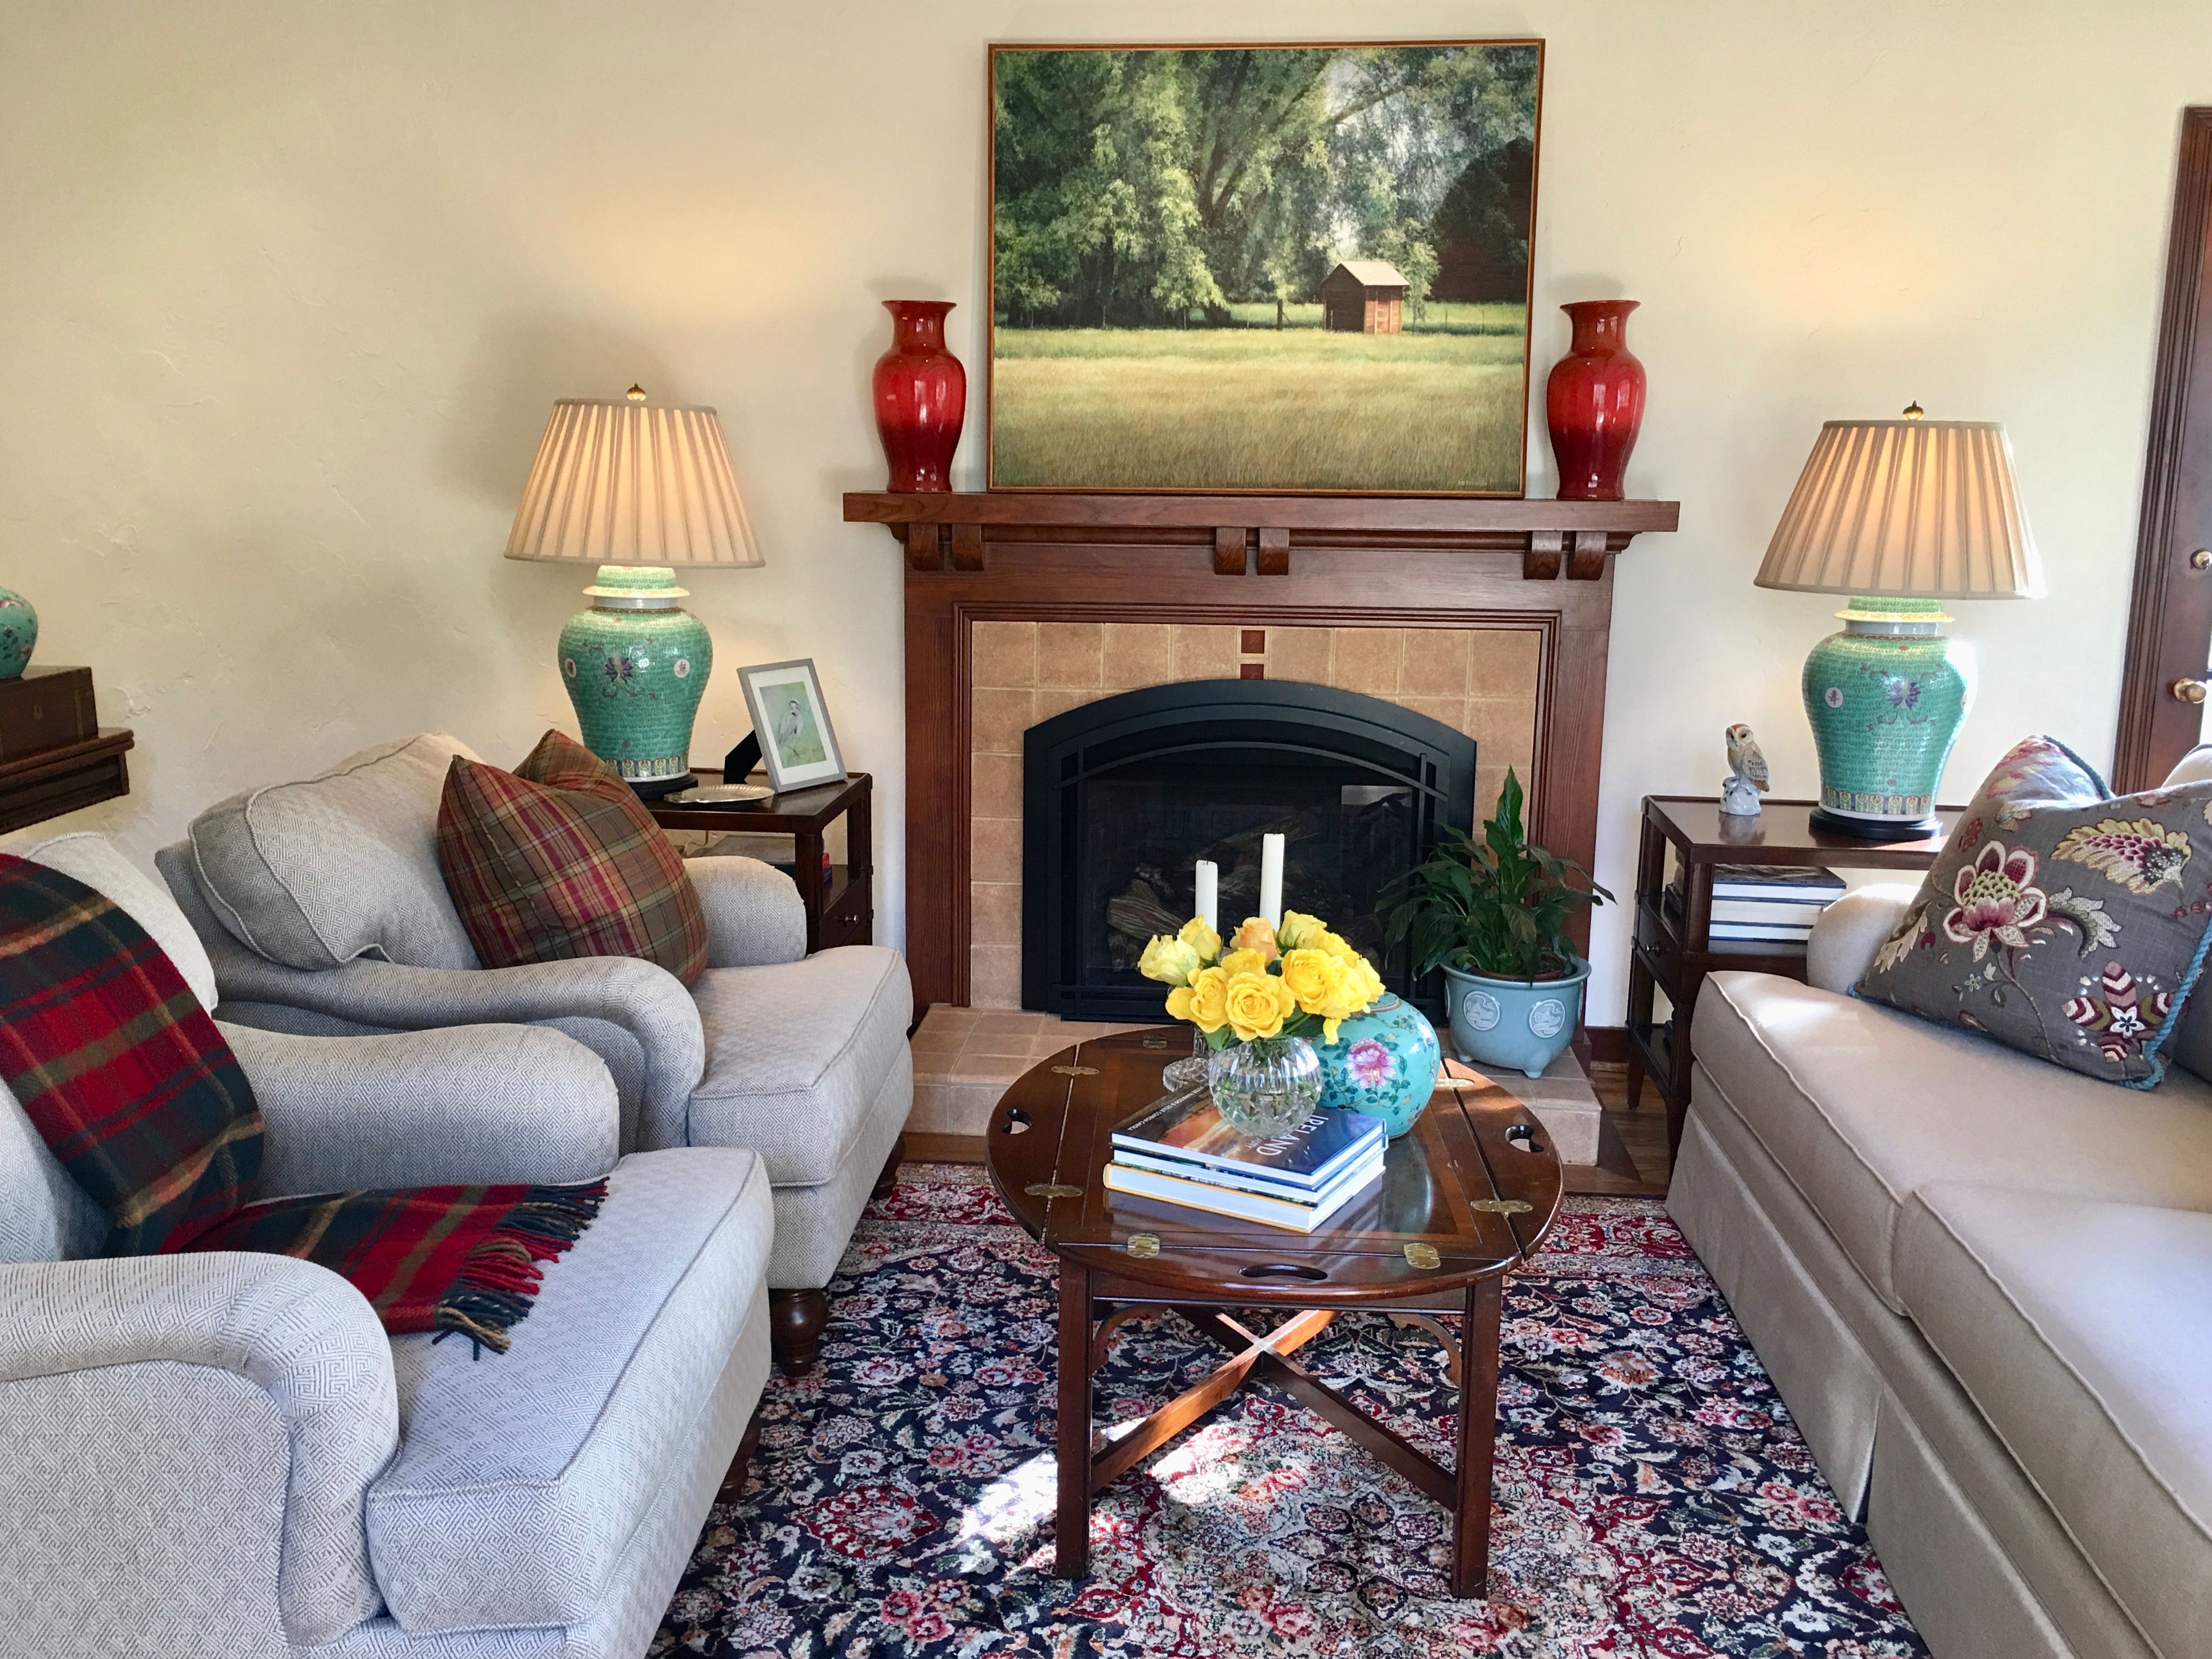
The room now has a warm and welcoming look, with owners’ possessions beautifully displayed and mixed seamlessly with the new furnishings.
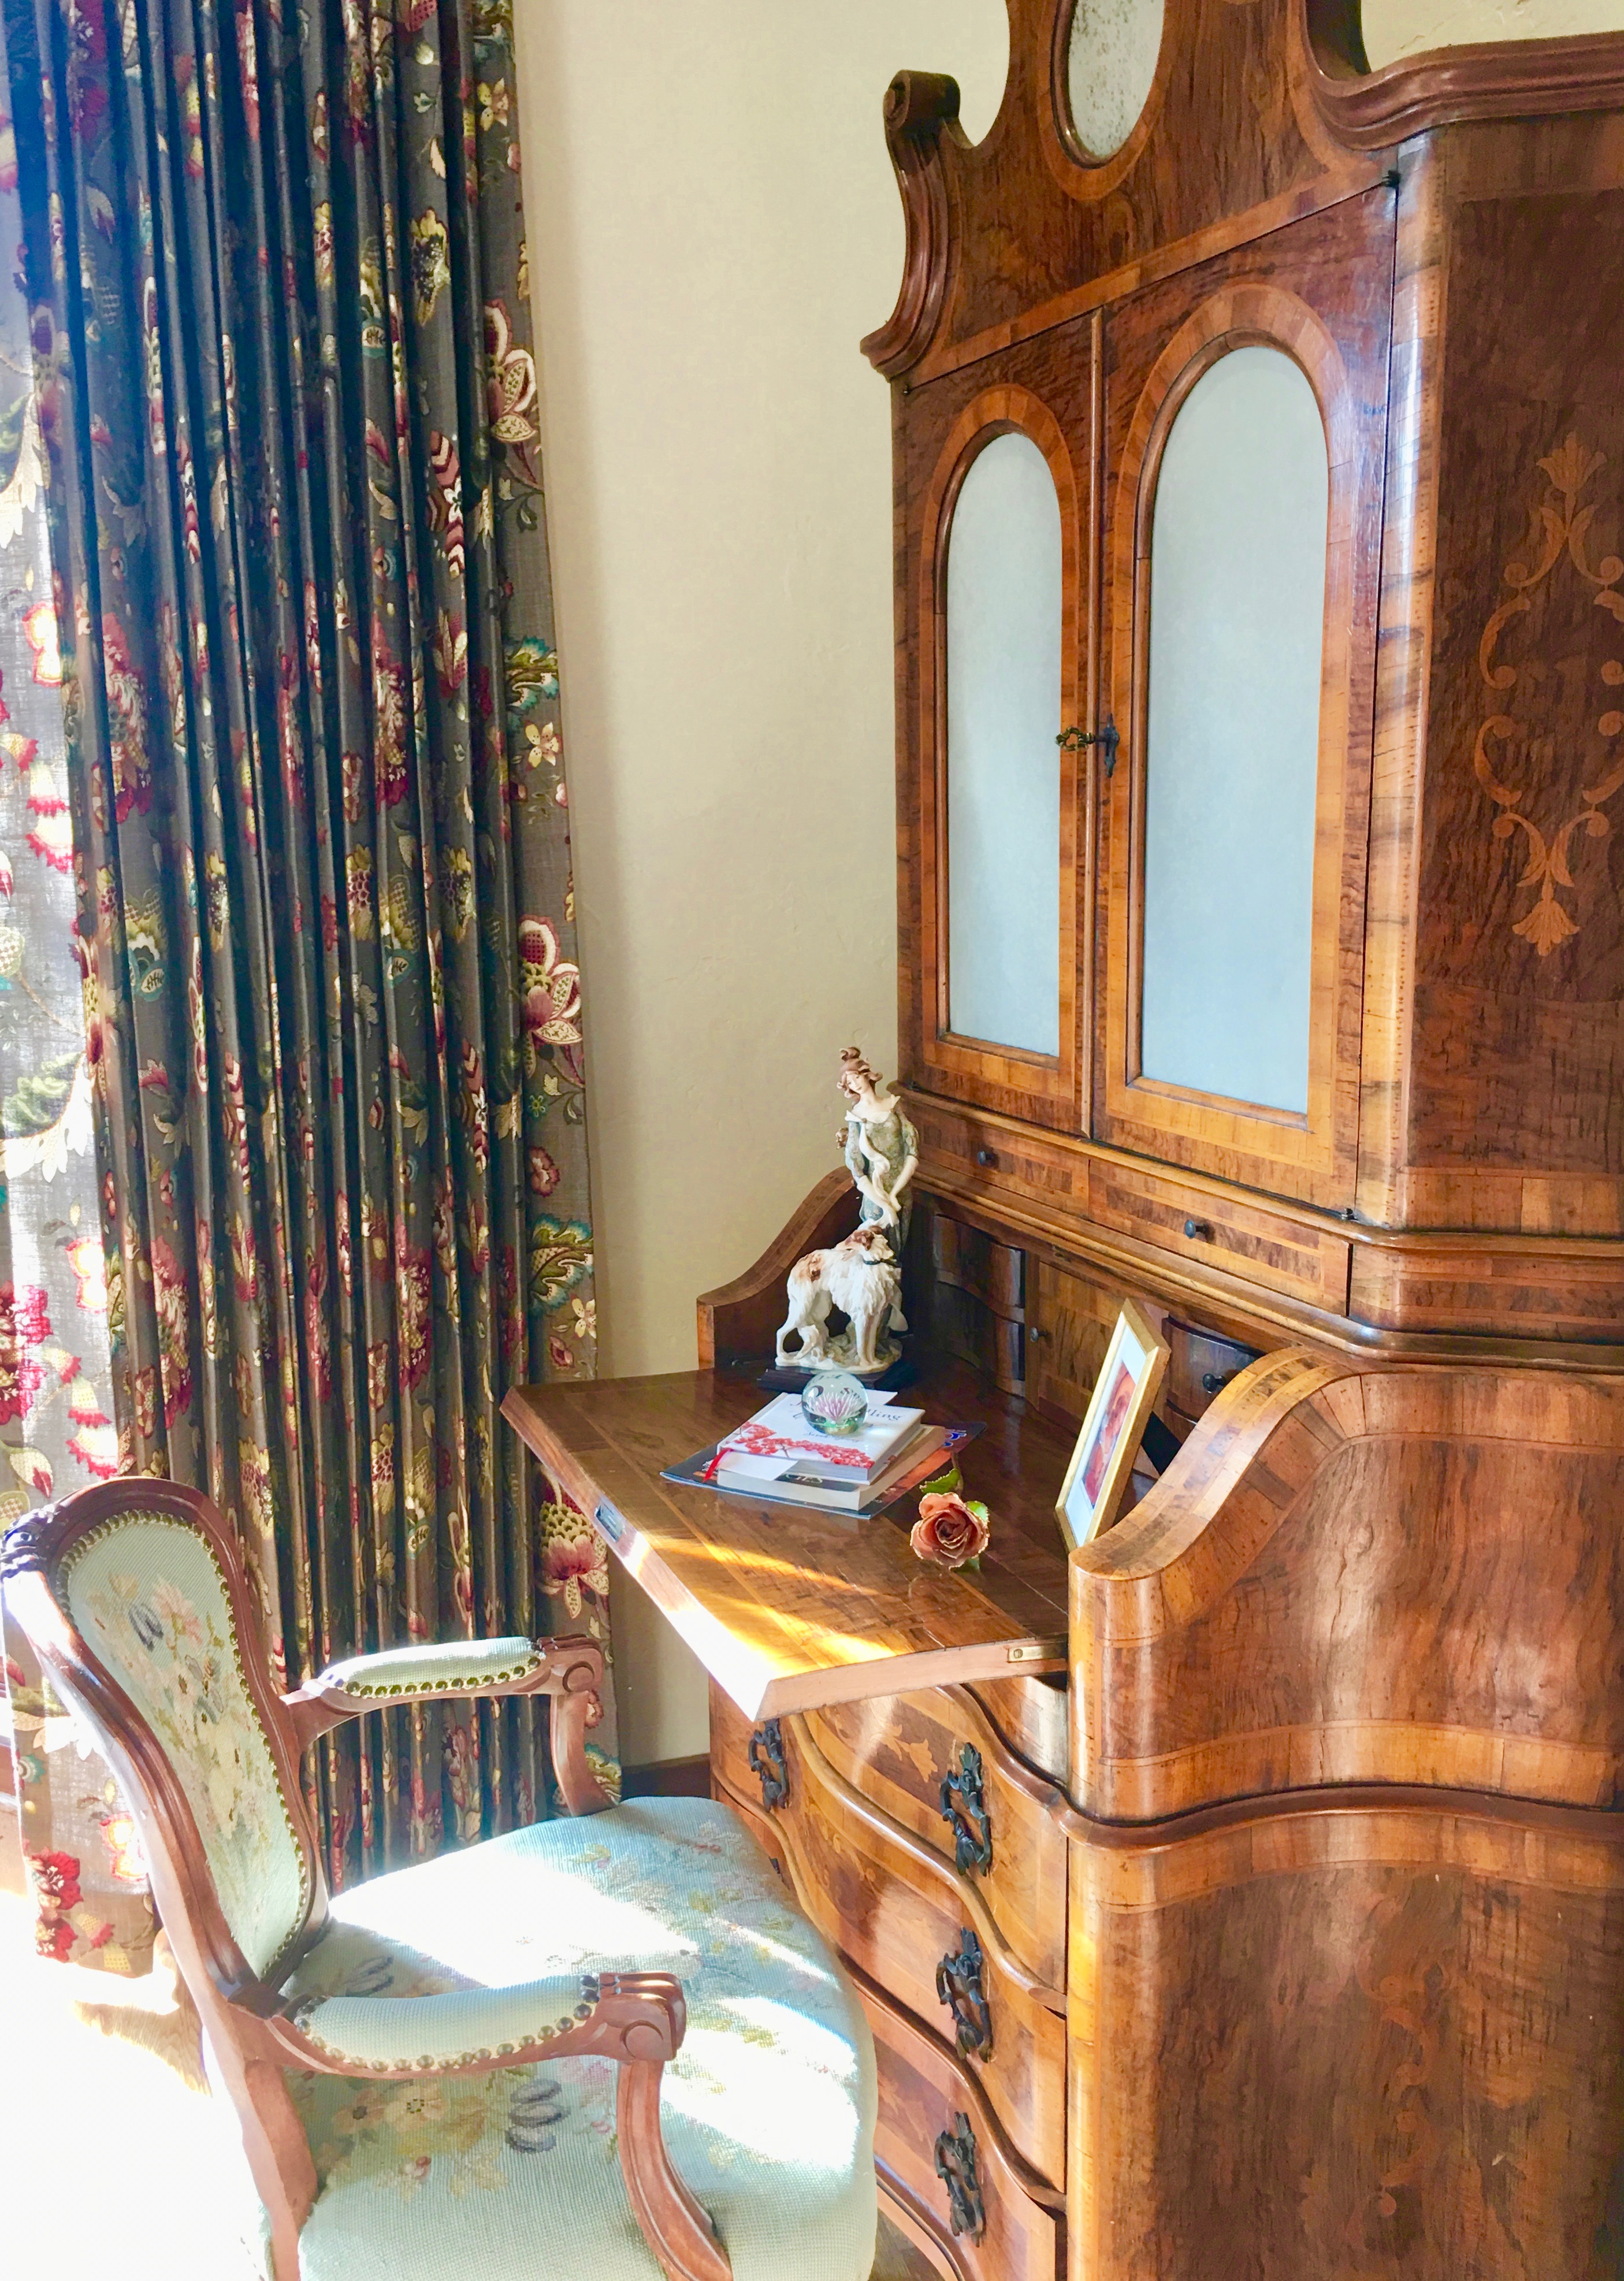
DETAIL: Antique secretary open with antique French armchair
DETAIL: Living room corner
Homes are always a work-in-progress, so there will probably be more items added to this casually elegant living room in the future. But for now it feels comfortable, welcoming, and personal.
“Kathia was wonderful to work with. Above all, she listened to us and sought to understand what we wanted and what style would fit both my husband and myself. Kathia’s skills in finding colors, fabrics and an overall look were a perfect match for our needs. We are so pleased with our new living room! I find myself spending lots of time in it–much more than ever before. It is so warm and inviting.”
When the client is happy, I’m happy! If you feel the need to change your spaces from dreary to delightful, give Emery & Associates a call. We love making house calls.
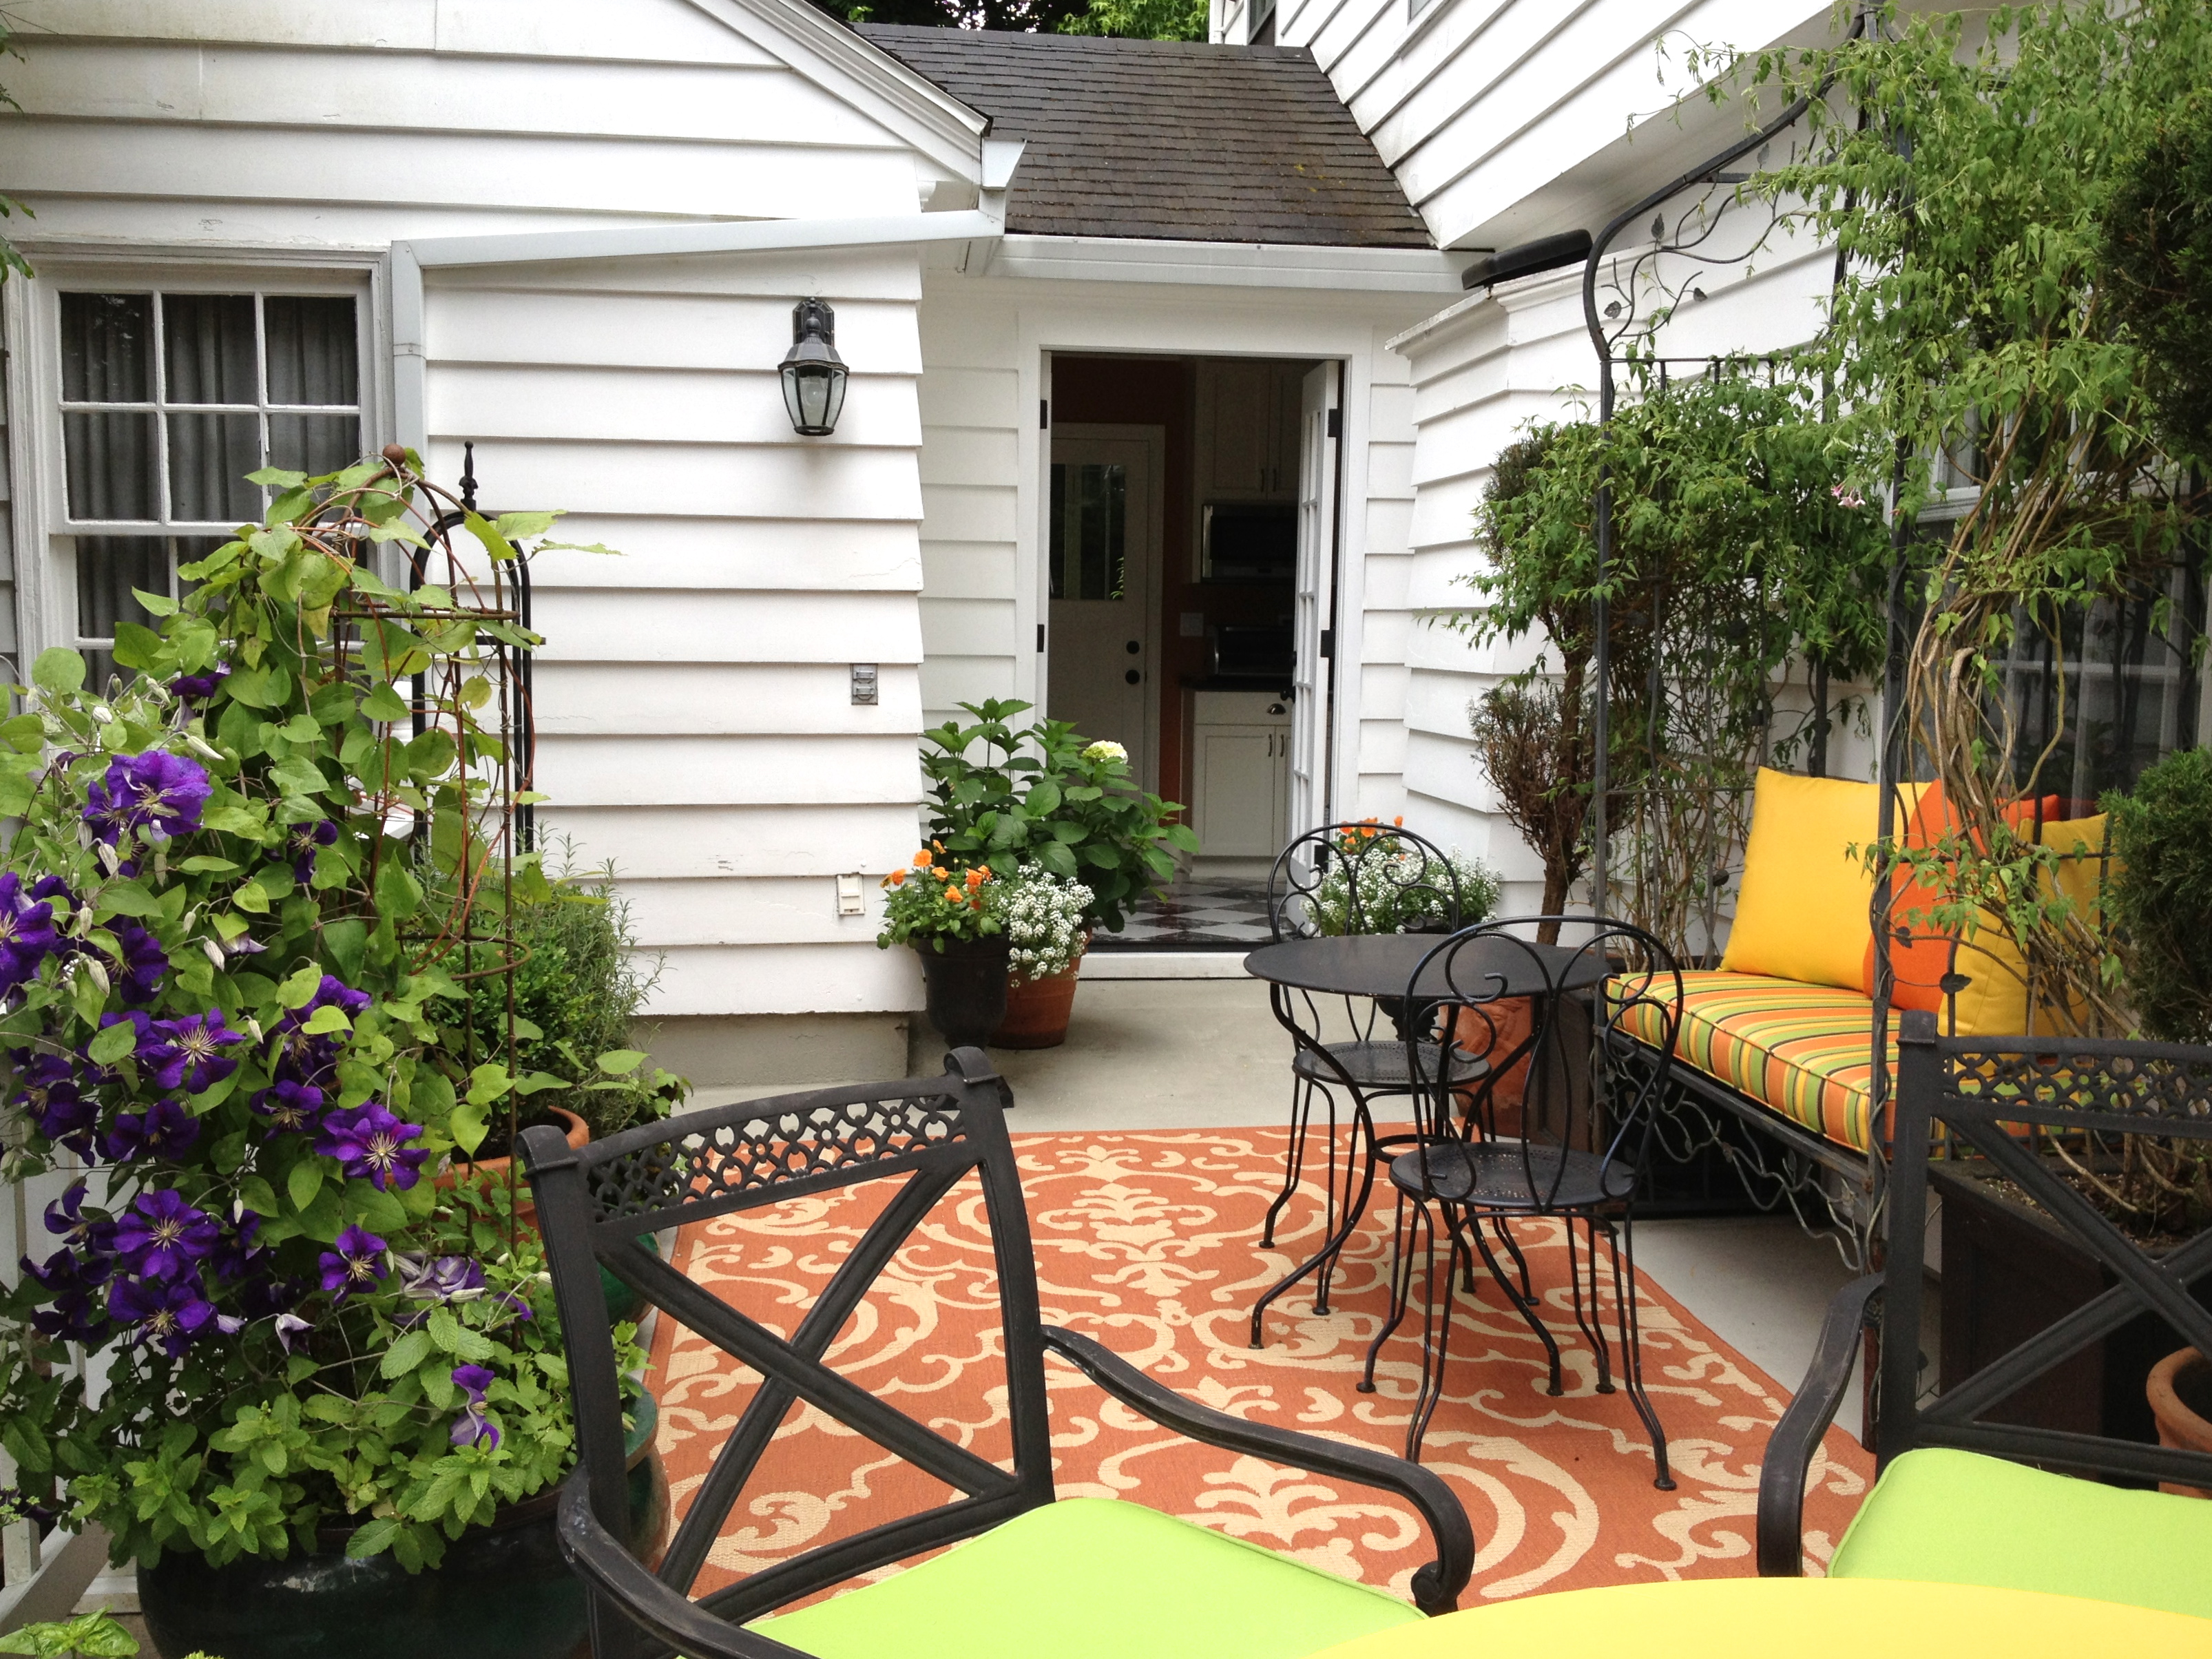
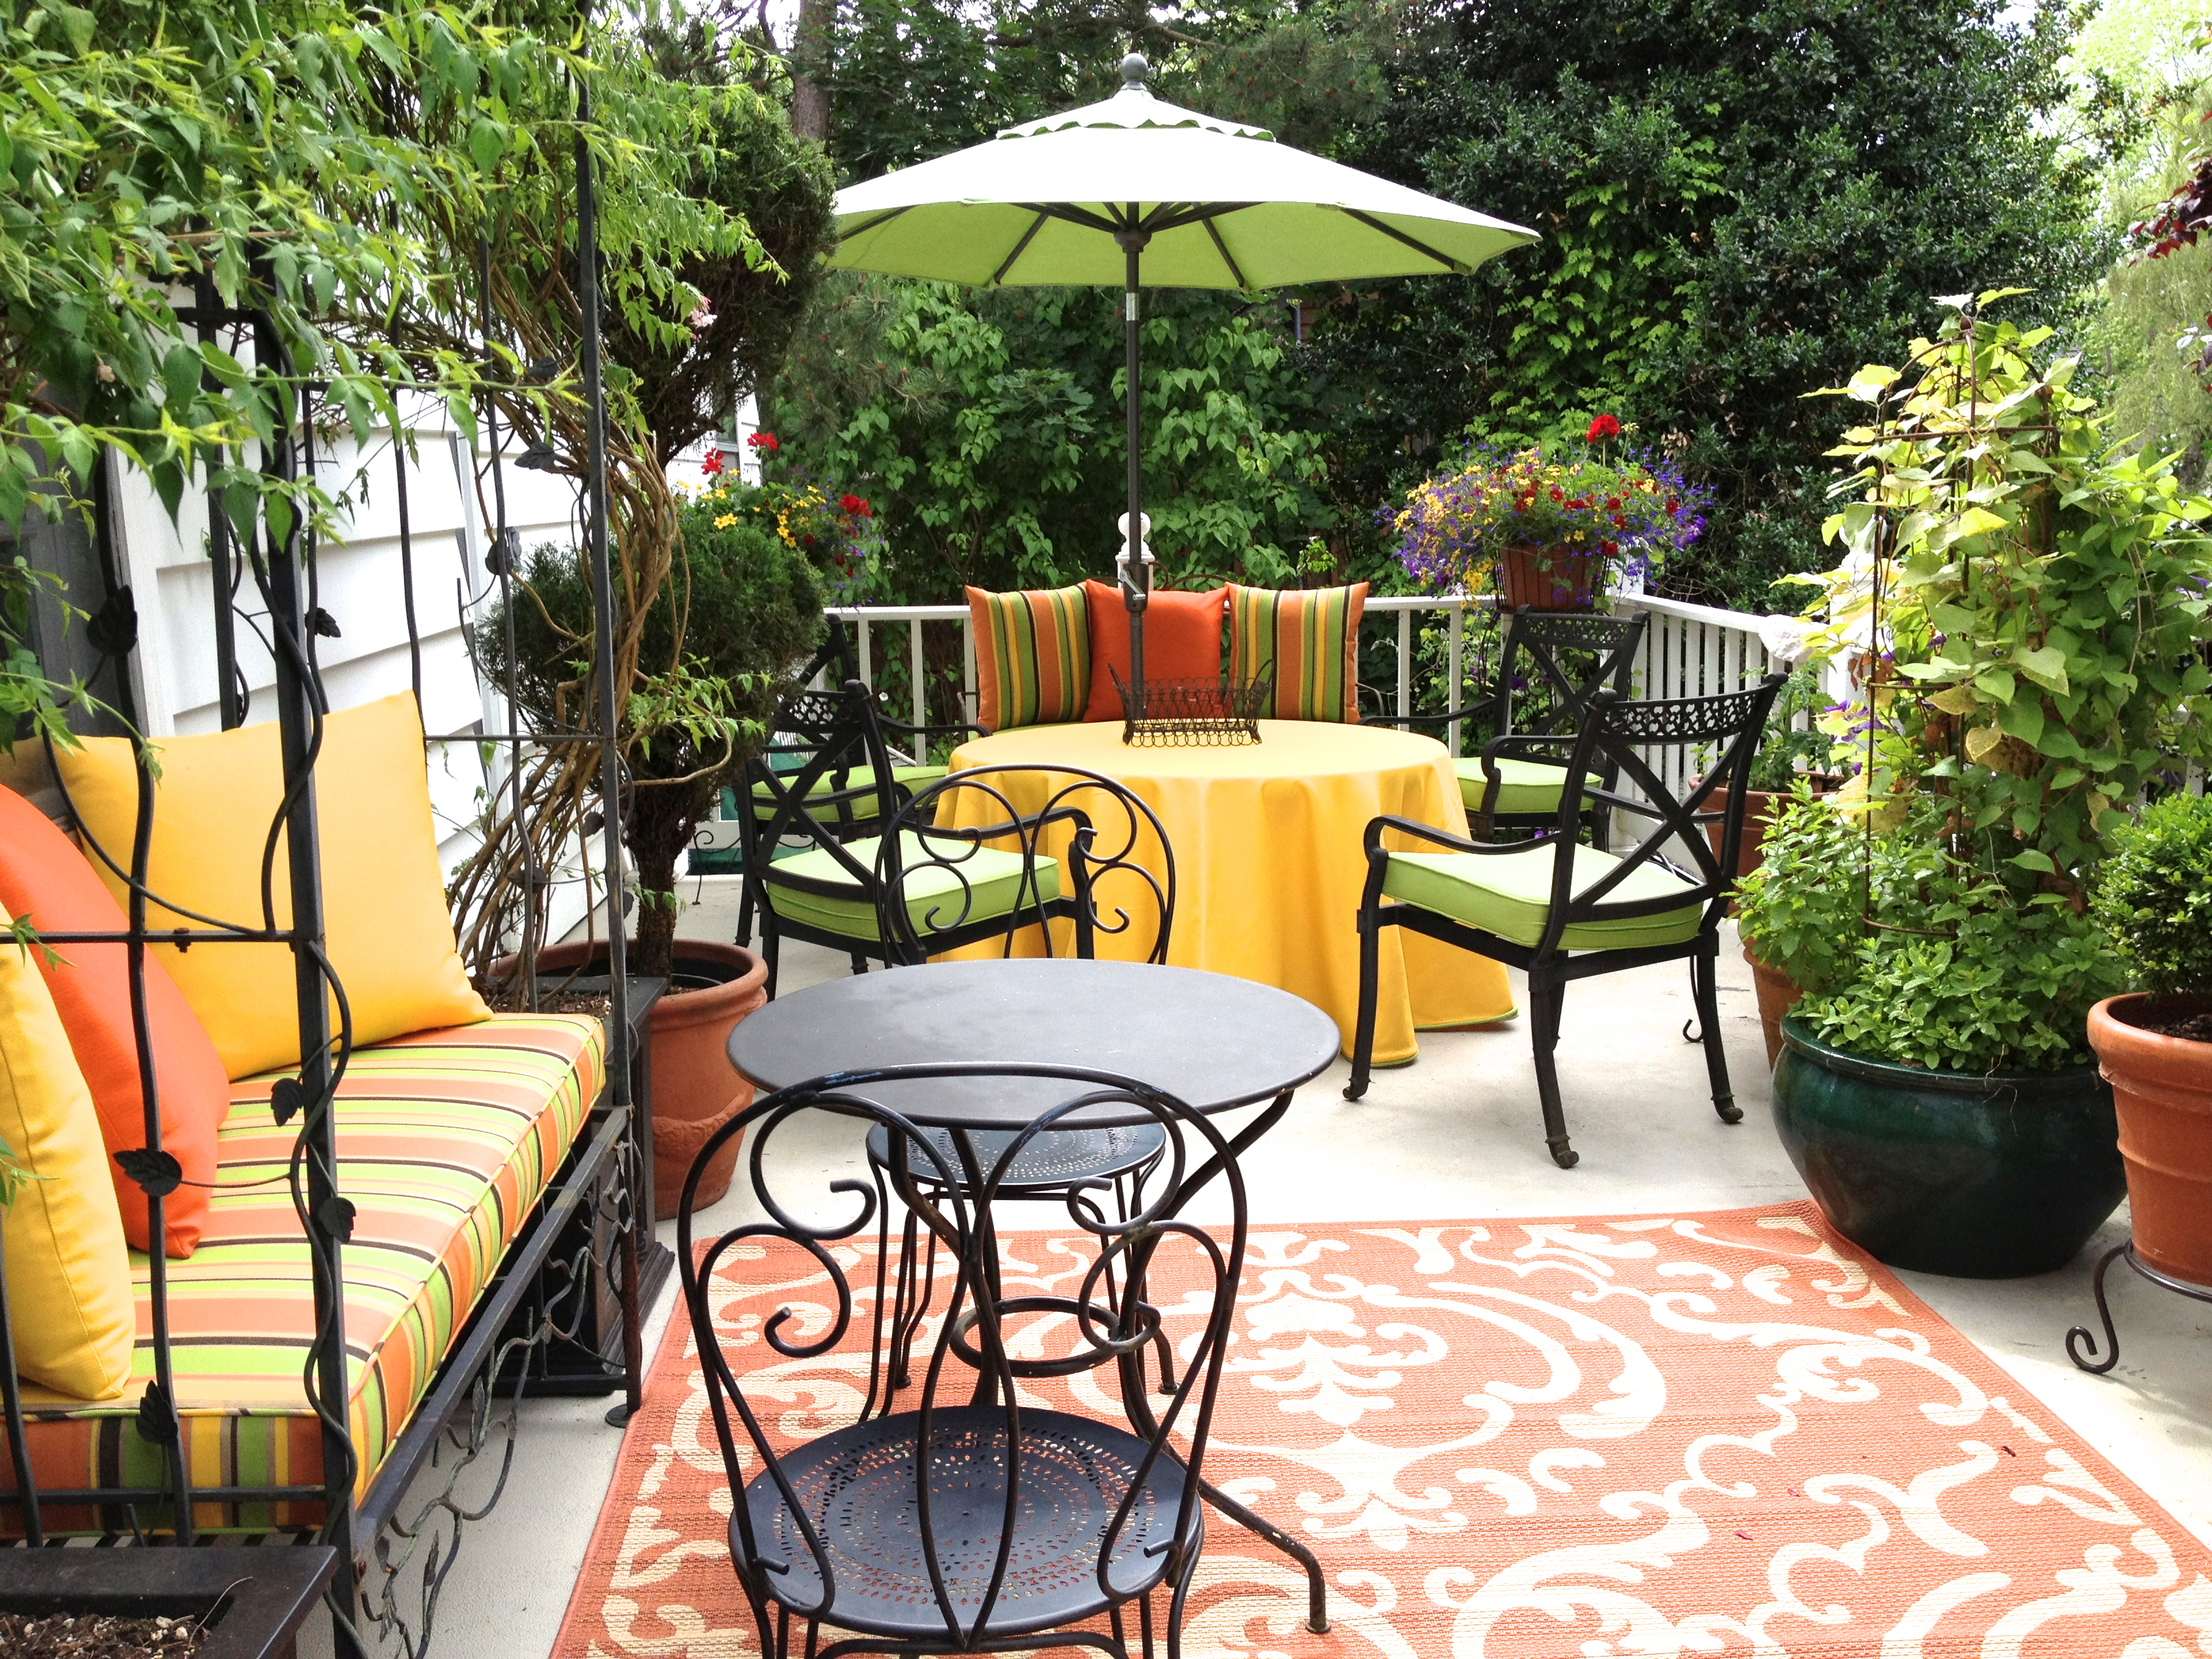
There’s nothing like a party to get things done around your house and garden. When I was planning my son’s 40th birthday party in early May, I got busy making sure our deck was party-ready. Deferred maintenance becomes really obvious when you start envisioning things from a guest’s point of view. Here are four essentials for turning your deck into an outdoor room.
Clear the deck: If your deck is stone, concrete or composite, give it a good power wash to get rid of dirt and algae. If it’s wood, it may need cleaning, sanding, and refinishing. Here’s my deck as it looked “BEFORE,” when we first moved in:
Define the space: Put down an outdoor rug to add color and define the space as a room.
Add furniture: If space permits, add seating and dining furniture. If you have a limited budget, check out resale shops and garage sales. If your old furniture looks tired, give it a coat of spray paint (my bistro table and chairs, above, have gone through many color incarnations). I love textiles, and my citrus-bright cushions warm up our north-facing deck. The Sunbrella indoor-outdoor fabrics from Robert Allen are still going strong after five years.
Add accessories: Pots of flowers, herbs, and trees give life to your outdoor deck. An umbrella is a must for shade relief. A serving cart, decorative trays, and candles in hurricane lanterns add a festive touch. This year I saw a tablecloth in a catalog that looked like it would work perfectly as a topper over my lemon-yellow round tablecloth, so I sent away for it. When it arrived, I was delighted with the way it not only added citrus accents (literally), but included a mosaic tile-like border of blue-and-white.
Since I have a lot of blue-and-white dishes, this 54″ square linen tablecloth gave me a wide range of options for setting my outdoor dining table.
DETAIL: Blue-and-white dishes on tablecloth
There’s nothing like dining al fresco with your family on a warm summer evening, or having a few friends over for drinks on the terrace in fine weather. I hope these ideas give you some inspiration for creating your own outdoor rooms.
On February 16, 2018, I was in Potter Valley, California, working on the historic Spotswood House, when I saw this view behind the house of antique farm equipment, with an enormous willow just beginning to leaf out. This photo perfectly captures the feeling one gets while being on a working farm that has been in operation since the 1880s.
In 2001 I helped to restore Spotswood House, whose grounds still include a working ranch (the homeowners raise prize-winning Arabian horses, as well as running a business in Ukiah). When we began the restoration, the house looked like this:
Spotswood House BEFORE
After collaborating with architect Michael Garavalgia in 2001, the house was restored to it’s original Victorian Italianate magnificence, and now looks like this:
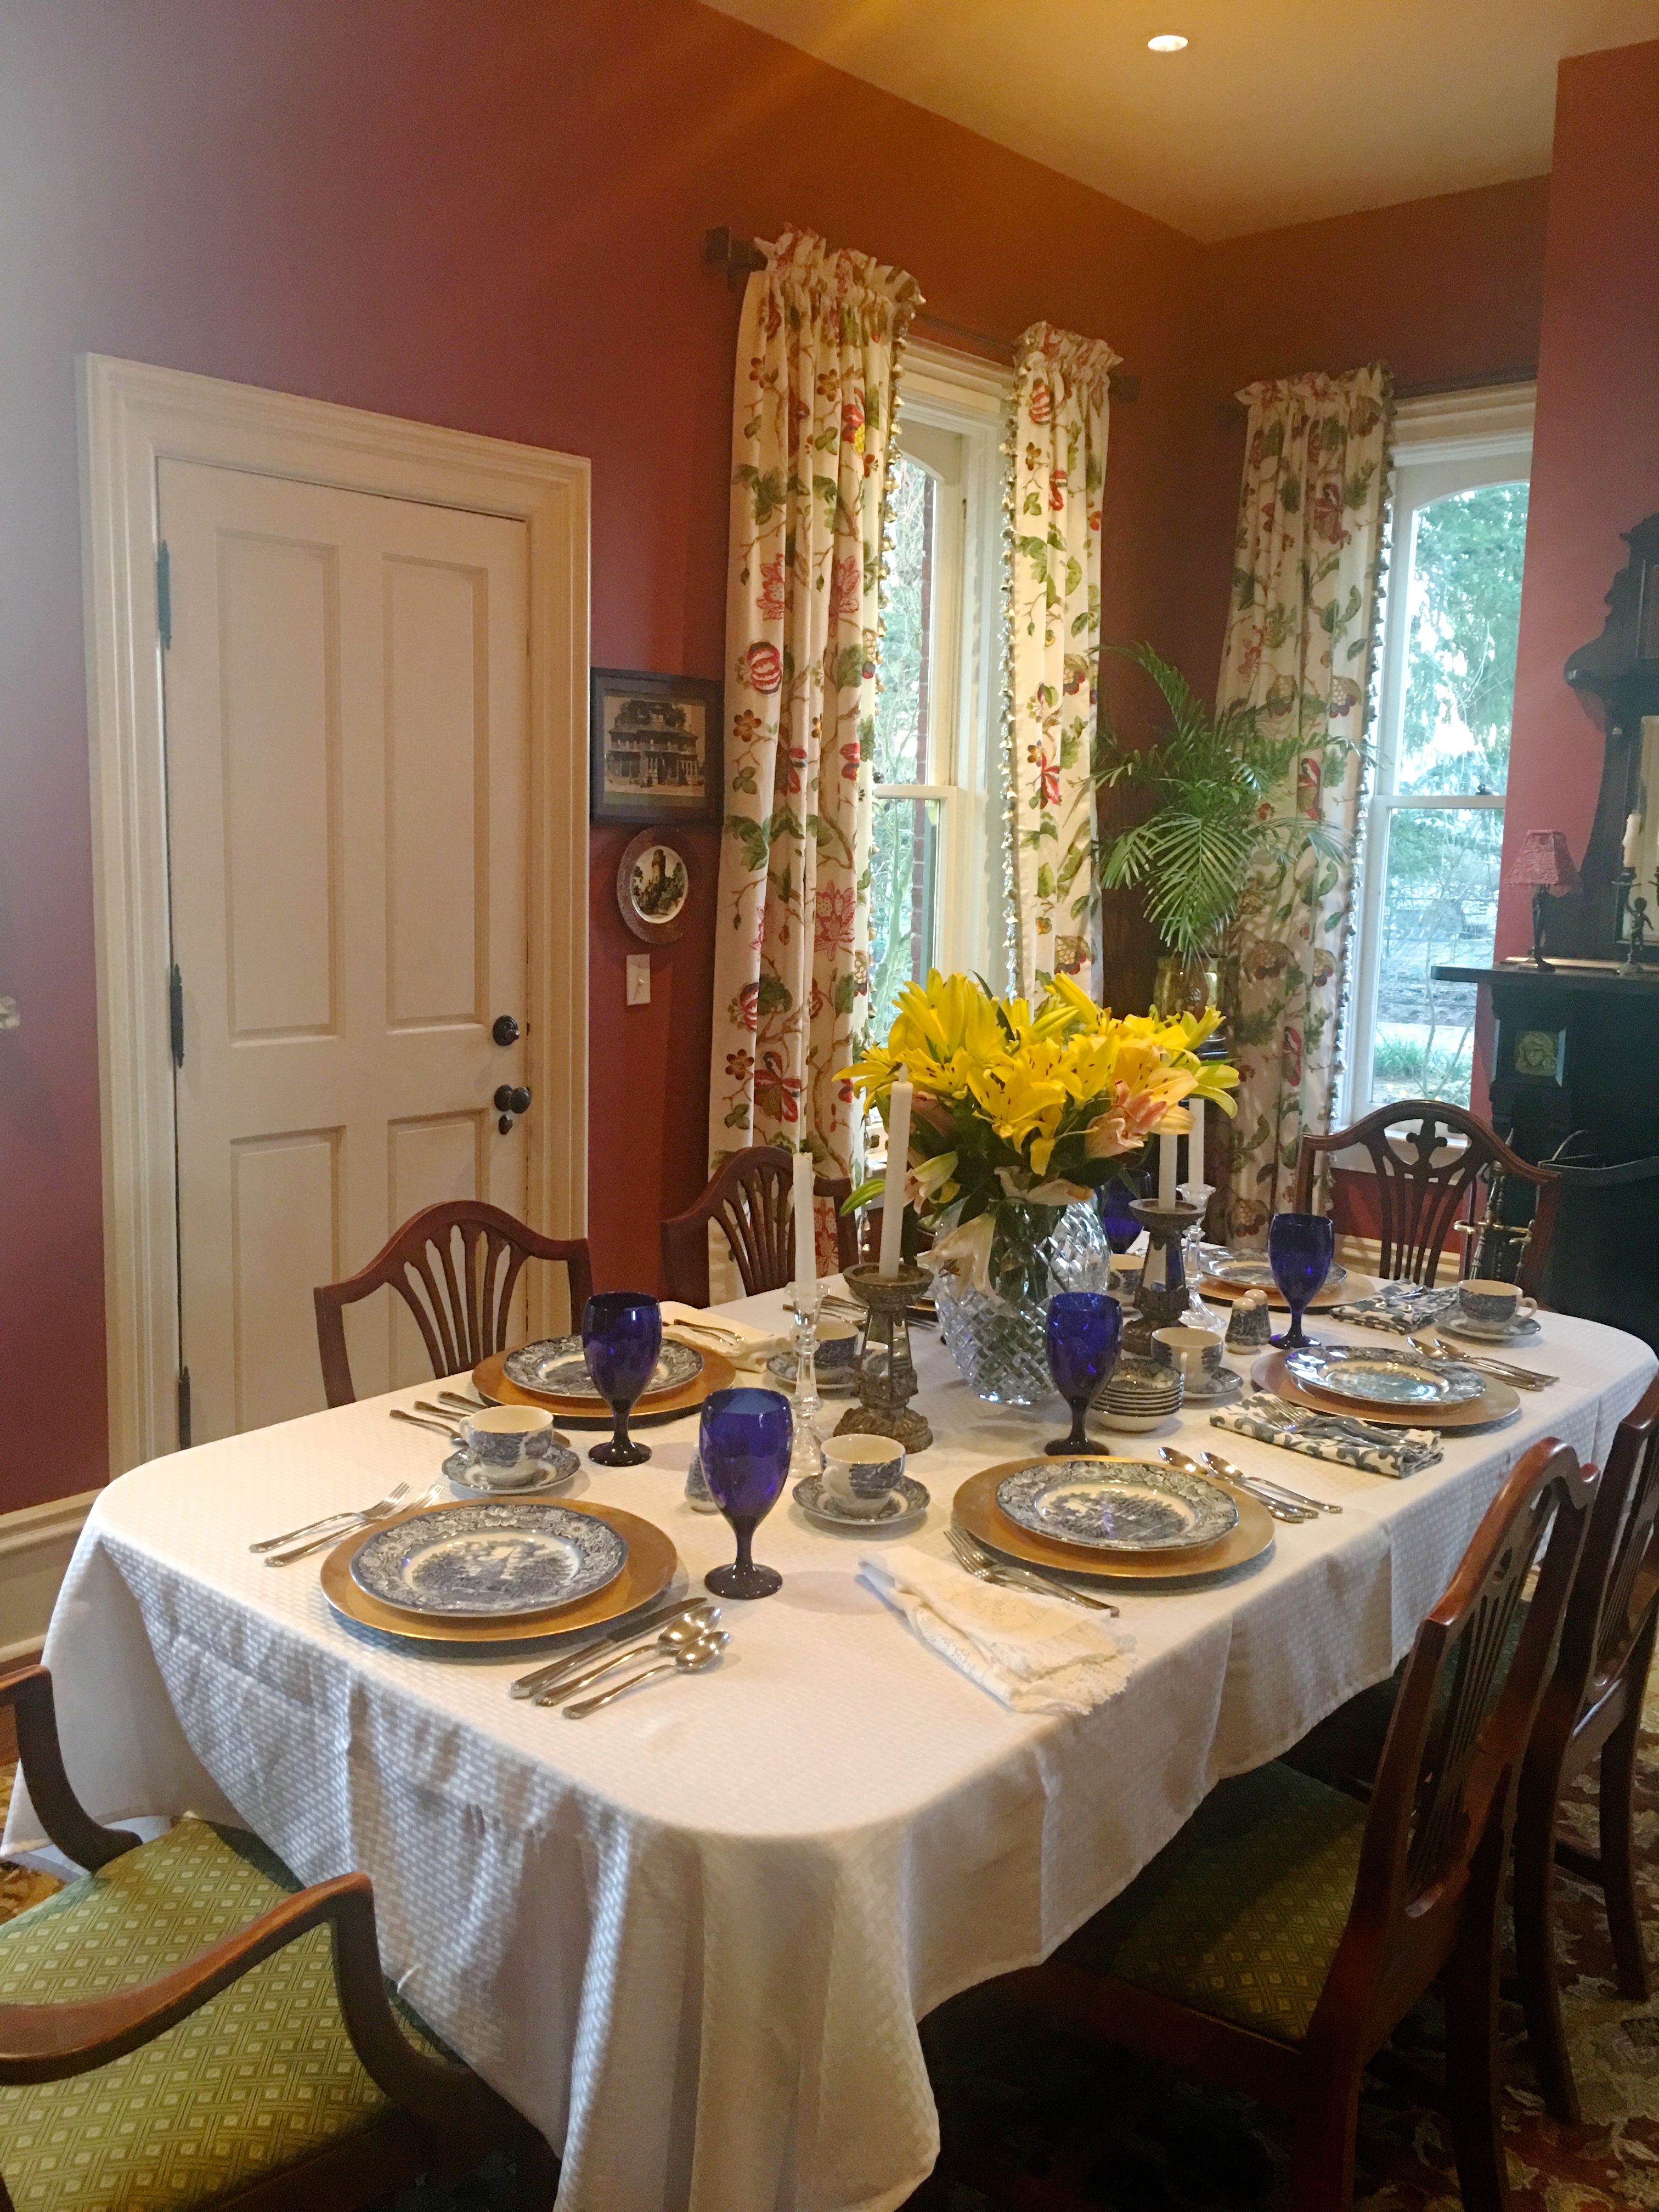
As with any home, the interiors are a continual work-in-progress. On this latest trip I was working on several of the interior spaces, including the installation of new draperies in the dining room. The embroidered sheer silk draperies that I installed in 2001 were exquisite, but had been ravaged by time and sun.
Sheer embroidered silk draperies, installed in 2001
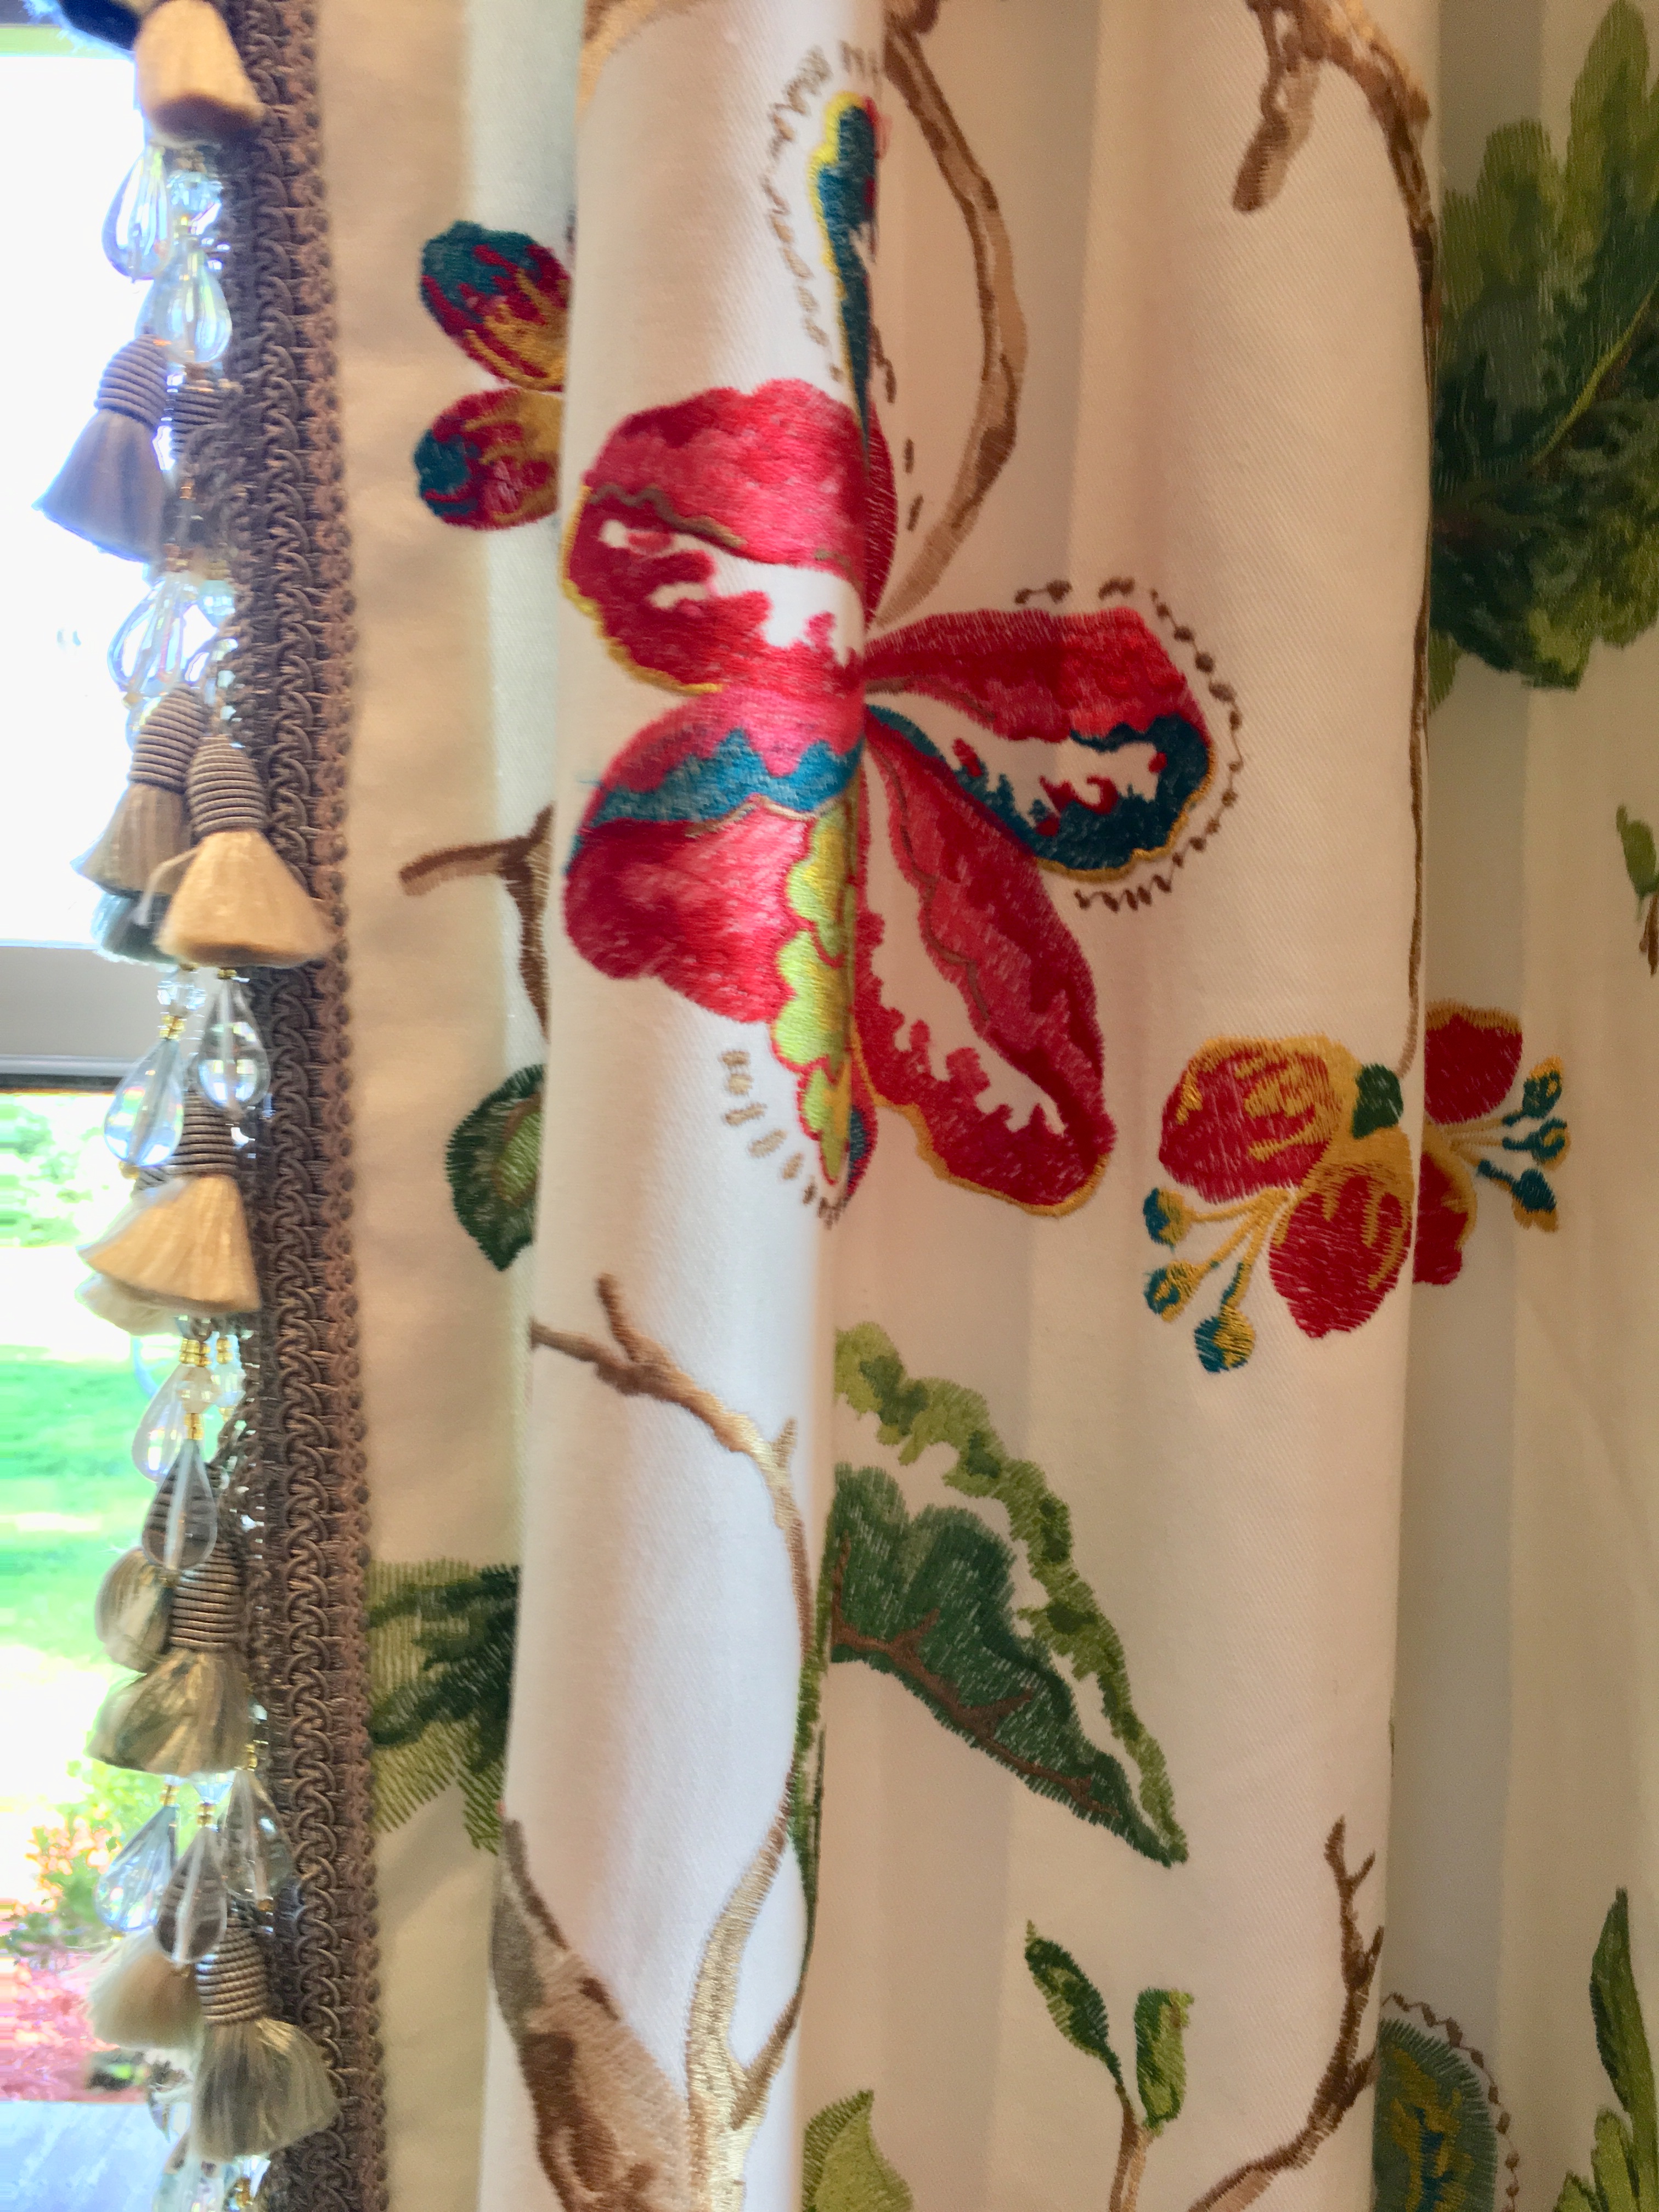
The homeowner loves the texture of embroidery, so I presented her with a cotton fabric embroiled with a tree-of-life floral on an ivory ground. Here’s a detail the finished new drapery, edged with crystal-beaded tassel fringe.
DETAIL: Spotswood House new dining room drapery
The new drapery complements the dining room’s red walls, and brings in all the colors of the owner’s garden:
New dining room draperies for Spotswood House
We will be bringing you more photos of this memorable home during the next few months, as plans are in place for a kitchen remodel as well as redecoration of the master bedroom and home office. Stay tuned! Go to our Facebook page to see more photos of the grounds of Spotswood House.
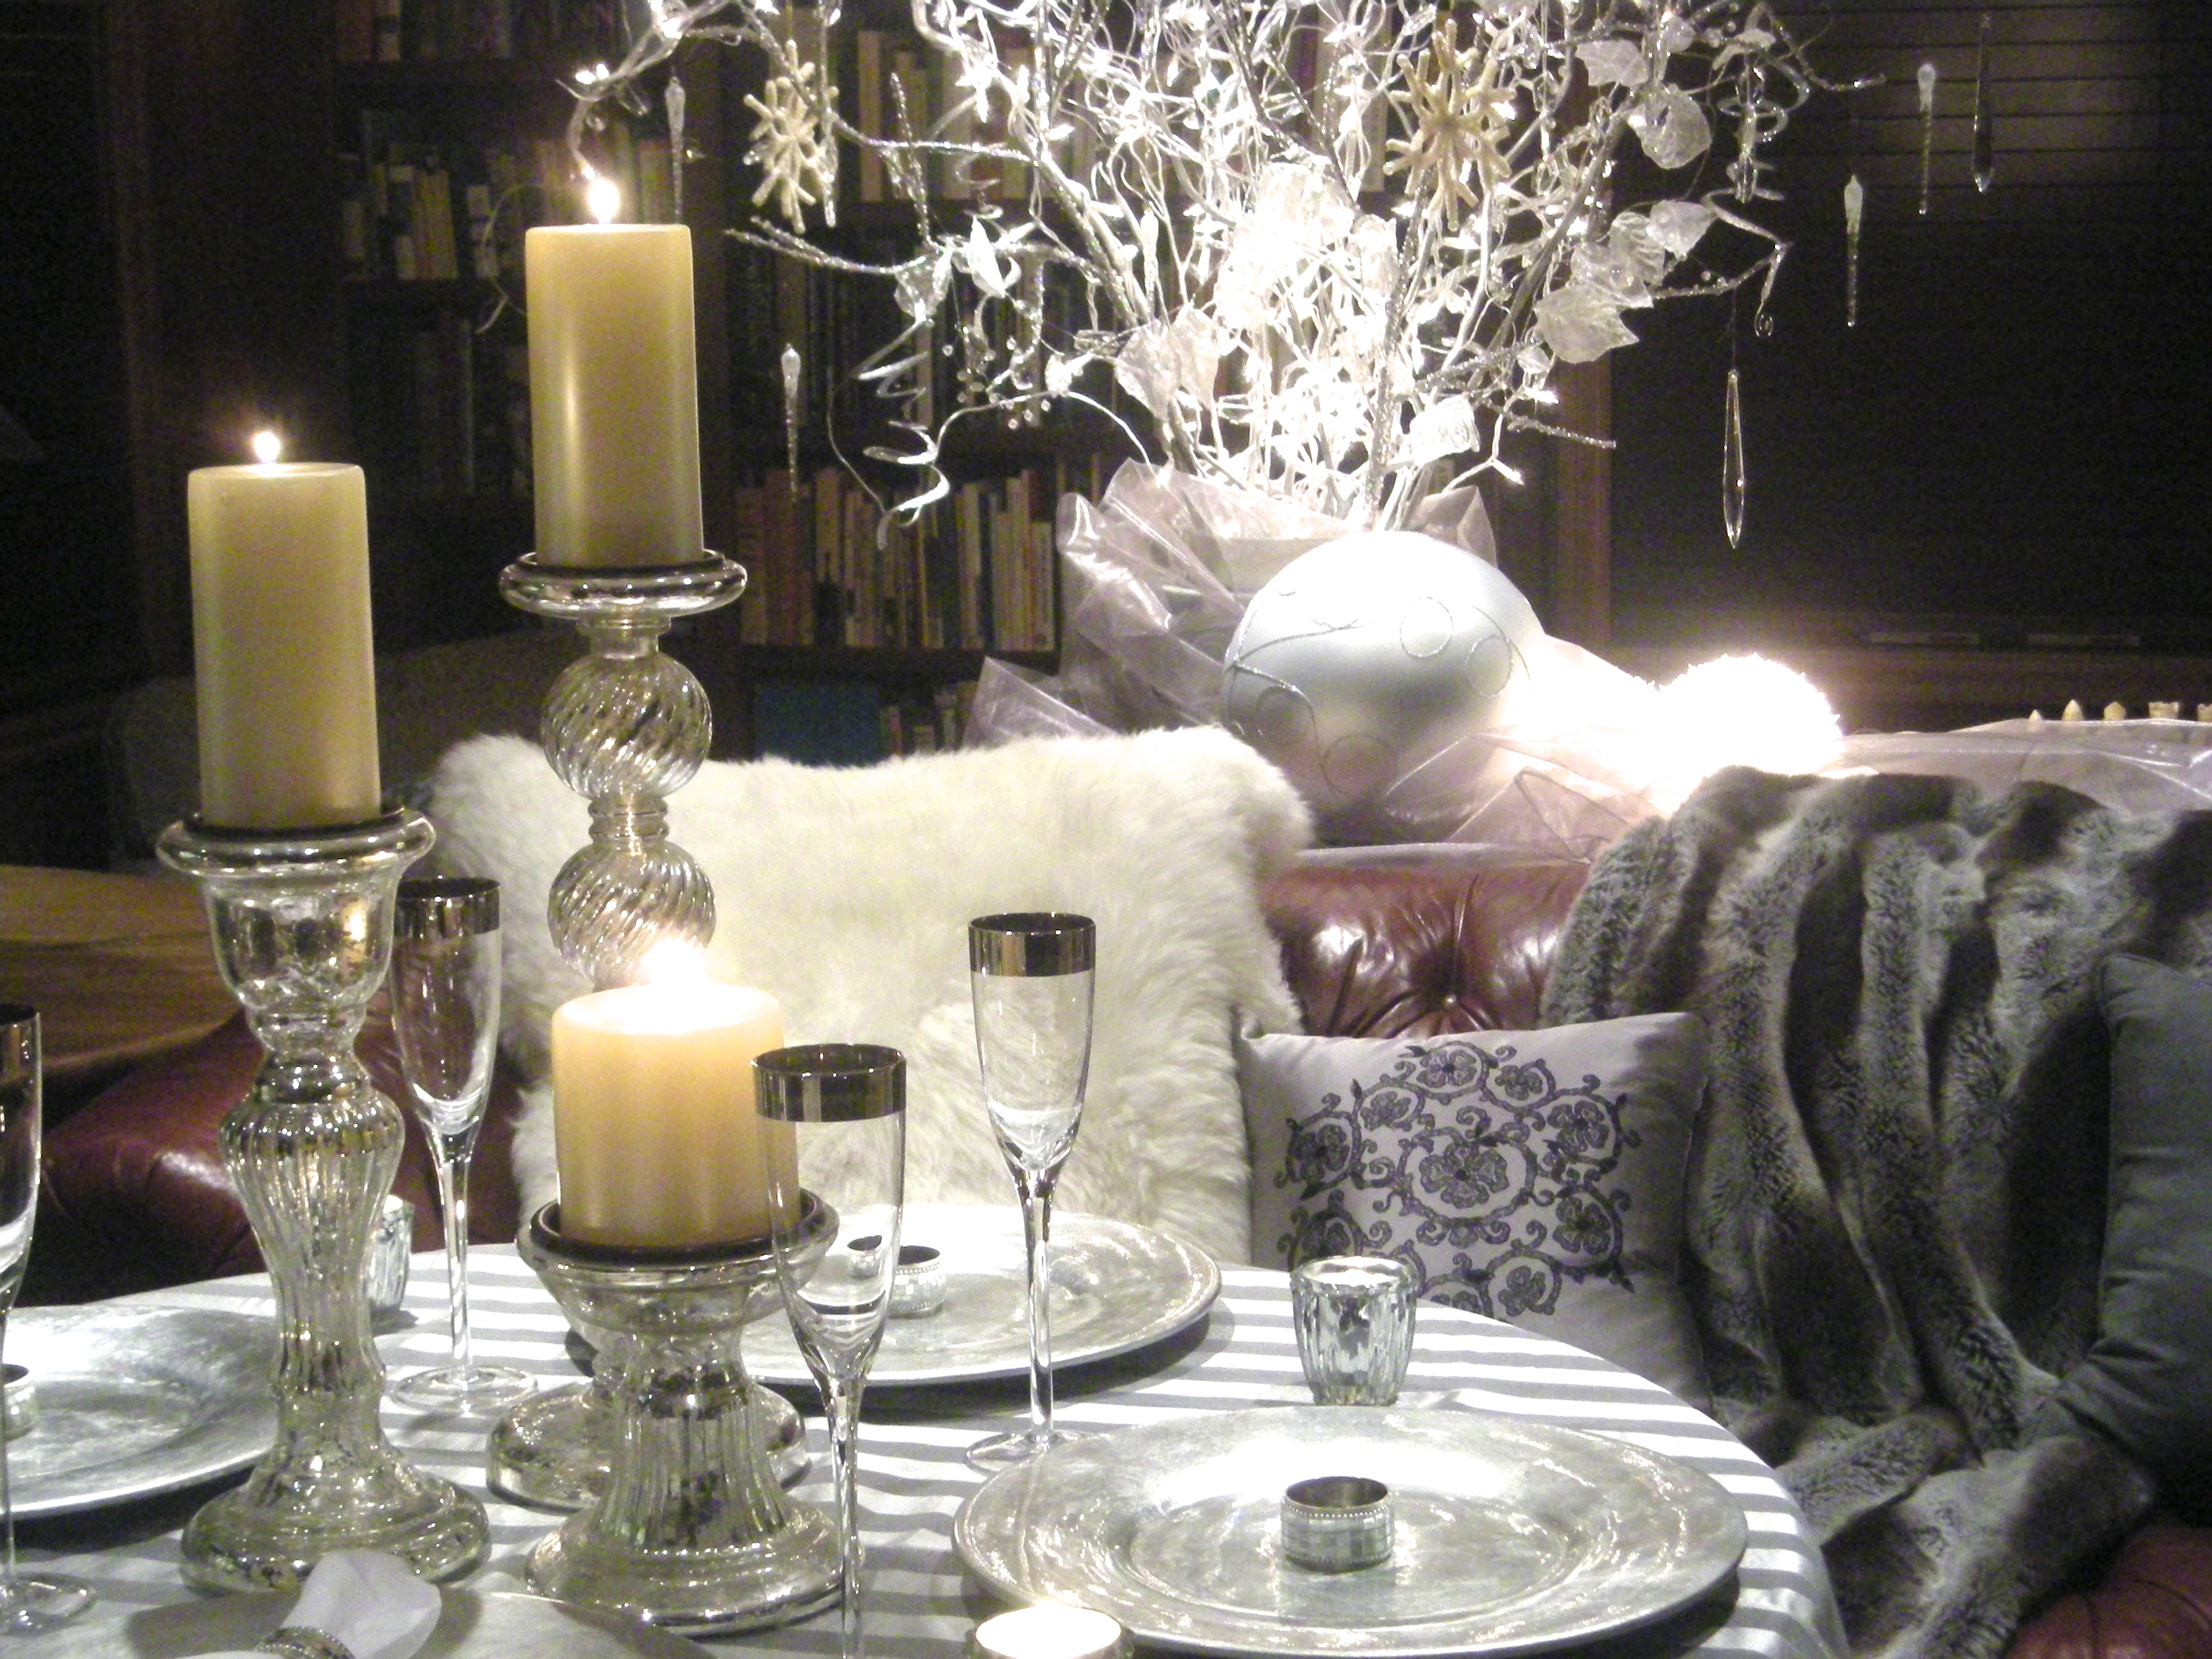
Have you ever wondered what the difference is between interior design and interior decorating? Using our home library as an example, I will illustrate the difference between these two essential concepts: interior design requires conceptualizing and outlining changes that require construction, whereas interior decorating refers to changes in color, furnishings, window treatments and accessories. The photo above was taken the year we had our home on the Duniway School Holiday Home Tour. This is an example interior decoration strictly for a seasonal affect. The silver mercury glass and chargers, glimmering bare-branch tree dripping with icicles, the tablecloth, fur throw and pillows were all brought in to create a winter wonderland look for the holiday tour. I would not have been able to create this decorated effect if we had not already done massive interior design on the space when we bought the house.
So let me back up to a “BEFORE” photo of this room. When we first bought the house in 2005, the library looked like this: dated center light fixture, acoustical tile ceiling, previous owner’s furnishings. I was not very keen on keeping the wood paneling, but I figured if we added built-in bookcases, heftier window and door trim, and put recessed lighting into the ceiling and soffits which replaced the acoustical tile and shed ceiling, the paneling would not dominate the room.
Here’s how the room looked AFTER my interior design changes. The painting on the bookcase wall hides the window which is visible in the “BEFORE” photo, but you can see the two windows on the left that are the same. The dramatic difference is brought about by the interior design changes (lighting, soffits, built-ins, new wood trim). The interior decorating is the furnishings part–rugs, upholstery, tables, lamps, art, and accessories.
Some projects require mostly interior design (kitchens, bathrooms), some require primarily interior decorating, but most of the time they require some of each. If a design firm does both interior design AND interior decorating, they are known as “full service interior design.” Emery & Associates is a full service interior design company.
Now please take another look at the winter wonderland version of the library. Can you see the Chesterfield sofa peeking out between the pillows? The wood table is draped with a silver tablecloth, and set for a special midnight meal. Magic! Give Emery & Associates a call if you want us to work our magic on your home.